Created by Michael Allen on Jul 06, 2017
Table of Contents
Overview
The first step to building channels on the Roku Platform is setting up a development environment. In this guide, we will cover the essential steps to enable Developer Settings on a Roku device.
Steps:
- Setup your Roku device to enable Developer Settings
- Accessing the Development Application Installer
Requirements to follow this guide:
Step 1: Setup your Roku device to enable Developer Settings
Using your Roku remote, enter the following sequence:

Follow the steps provided in the following flow to enable Developer Settings:
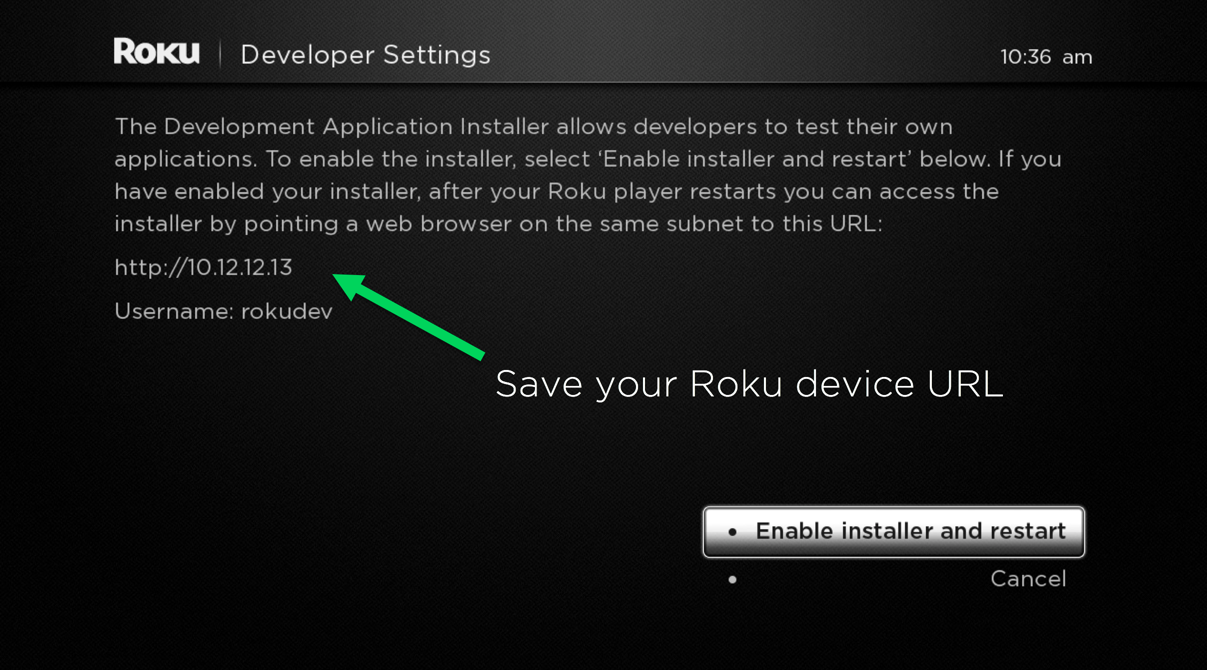
Once you begin this process, the dialog will prompt you to restart the device to continue to the process.
After enabling the installer, review and complete the SDK License Agreement:
You can review the full text at docs.roku.com/doc/developersdk/en-us
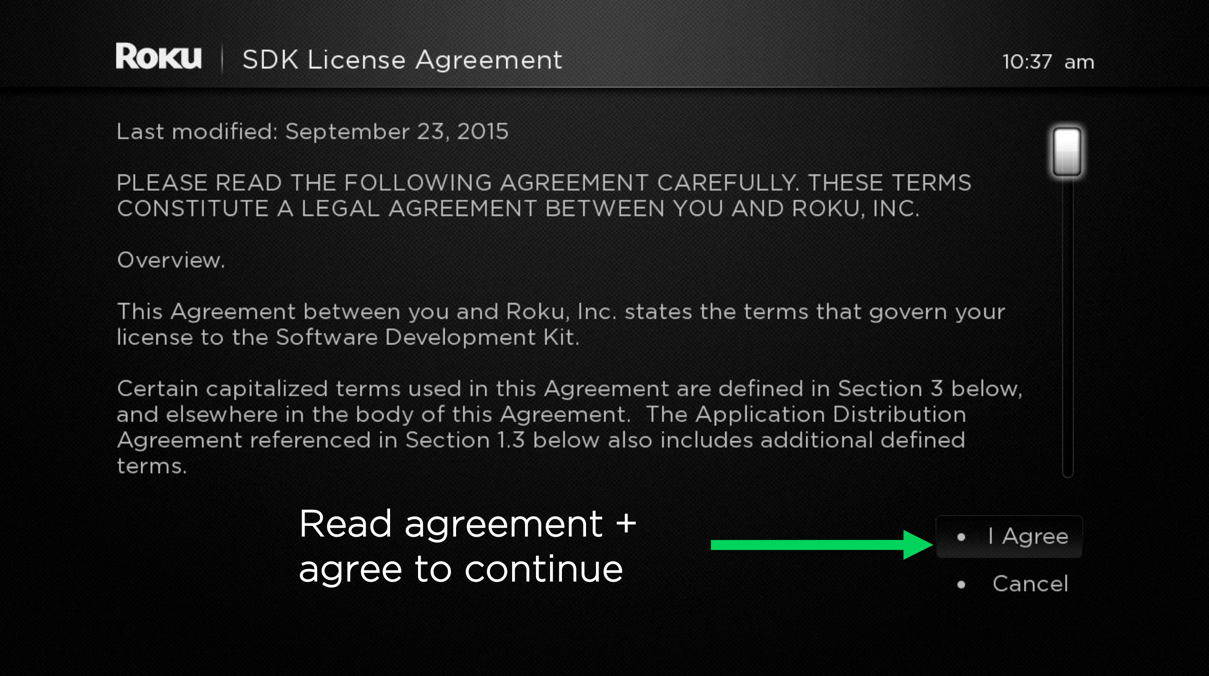
The following prompt will ask to set a password for the Roku device:
This ensures your device is protected on your local area network.
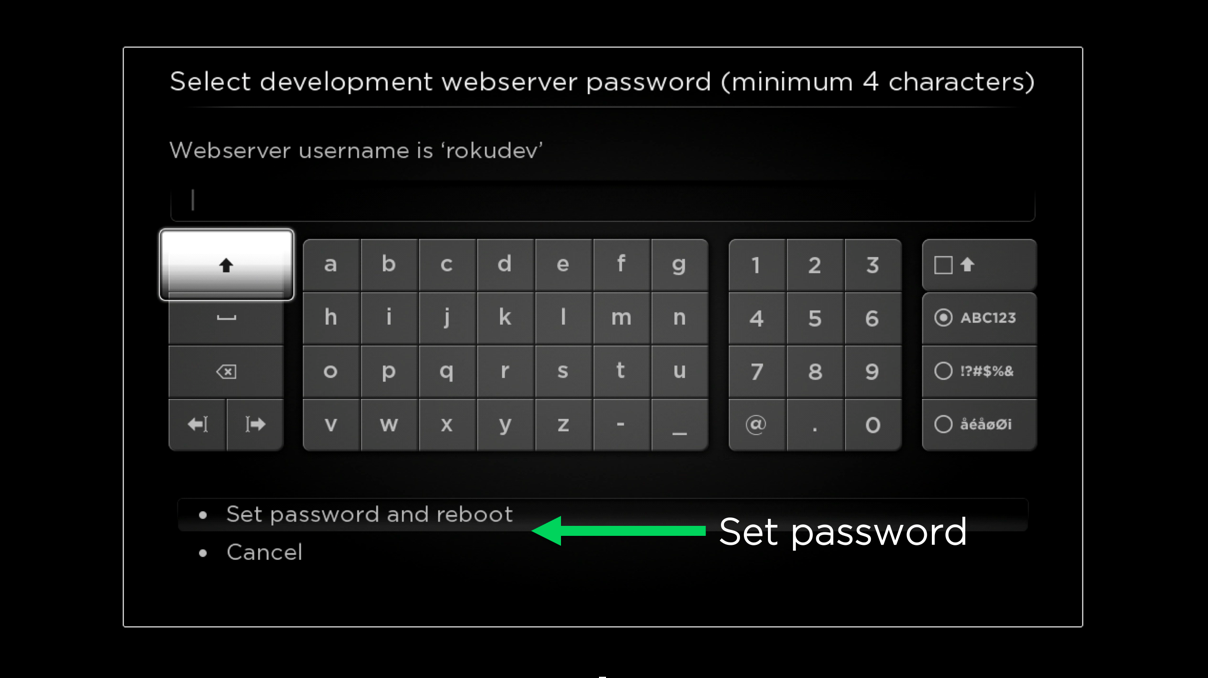
This completes the steps for enabling Developer Settings. Continue to the next section for loading applications onto the device.
Step 2: Accessing the Development Application Installer
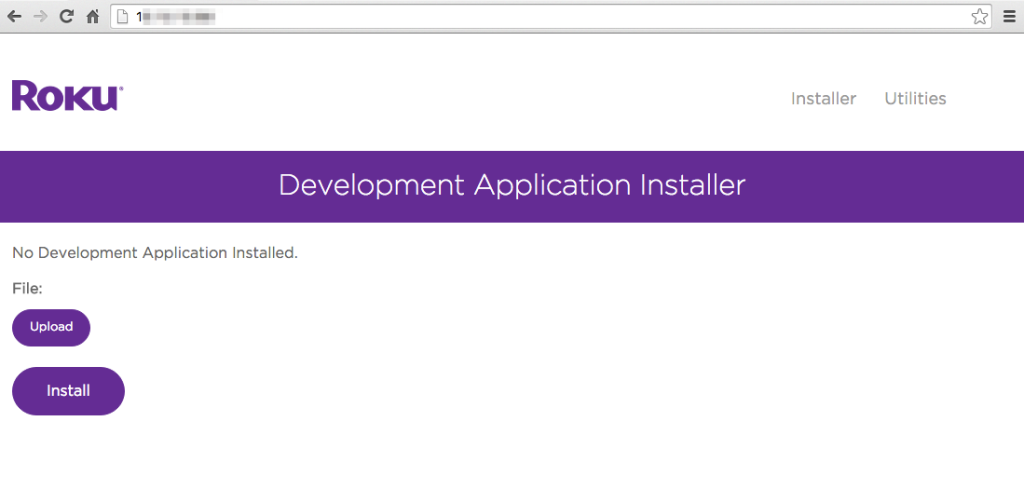
After rebooting, open a web browser and enter the Roku device URL (i.e. http://192.168.x.x)
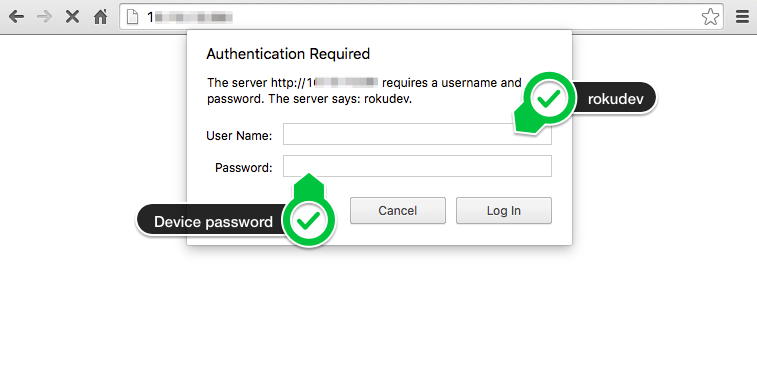
Once the page opens, you have successfully connected to your Roku device with Developer Settings enabled.
The main screen will show the Development Application Installer:
Step 3: Next Steps
Now that you have configured and enabled Developer Settings on your Roku device, it’s time to create a sample application.
Our introductory Hello World Guide offers a downloadable sample application for developing on the Roku Platform.

Explore the Developer Documentation!
After the Getting Started guides - explore the developer documentation!
Go to sdkdocs.roku.com and explore the methods, parameters, and syntax for building rich and complex channel applications on the Roku Platform.


