Table of Contents
Using the Developer Dashboard to Set Up Monetization
The in-channel purchasing or pay-to-install products you want applied to your channel are chosen in Developer Dashboard prior to implementing the code. For developers new to Roku development, see the overviews on Monetization and Roku Pay and In-Channel Purchasing.
Adding Monetization to a Channel
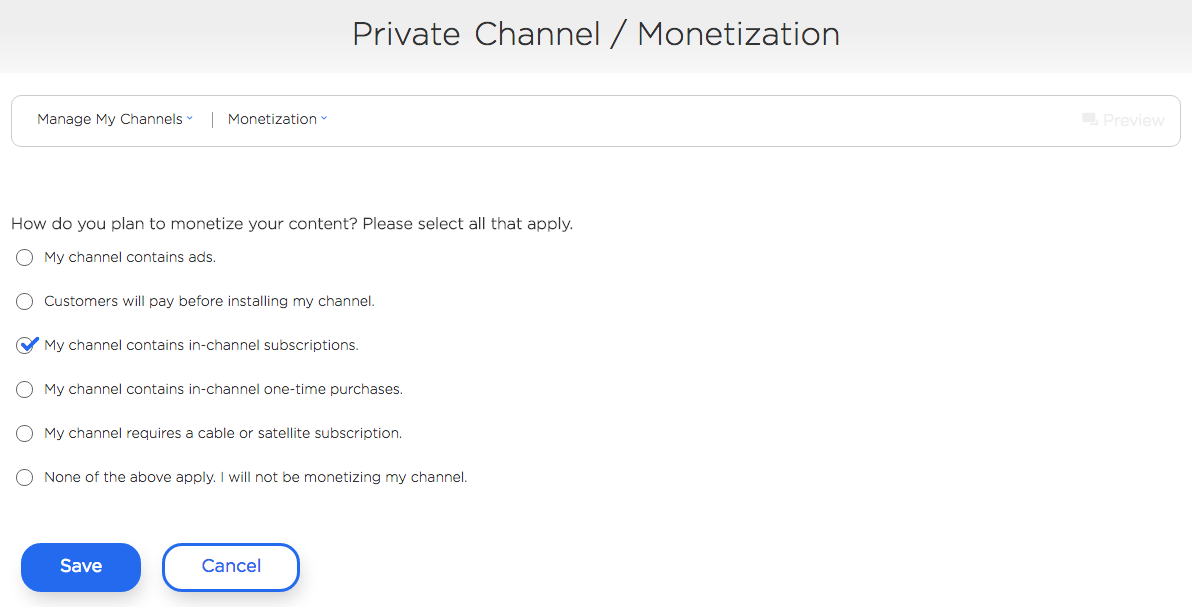
In the Developer Dashboard choose Manage My Channels. Click the channel you want to monetize. From the drop-down menu choose Monetization.
On the Monetization screen, select how you plan to monetize your channel. You can select more than one type of monetization for a single product. In this example, My channel contains in-channel subscriptions was selected.
Adding an In-Channel Product
The next step is to add an in-channel product, such as a subscription, to one or more of your channels by choosing Manage My In-Channel Products on the Developer Dashboard.
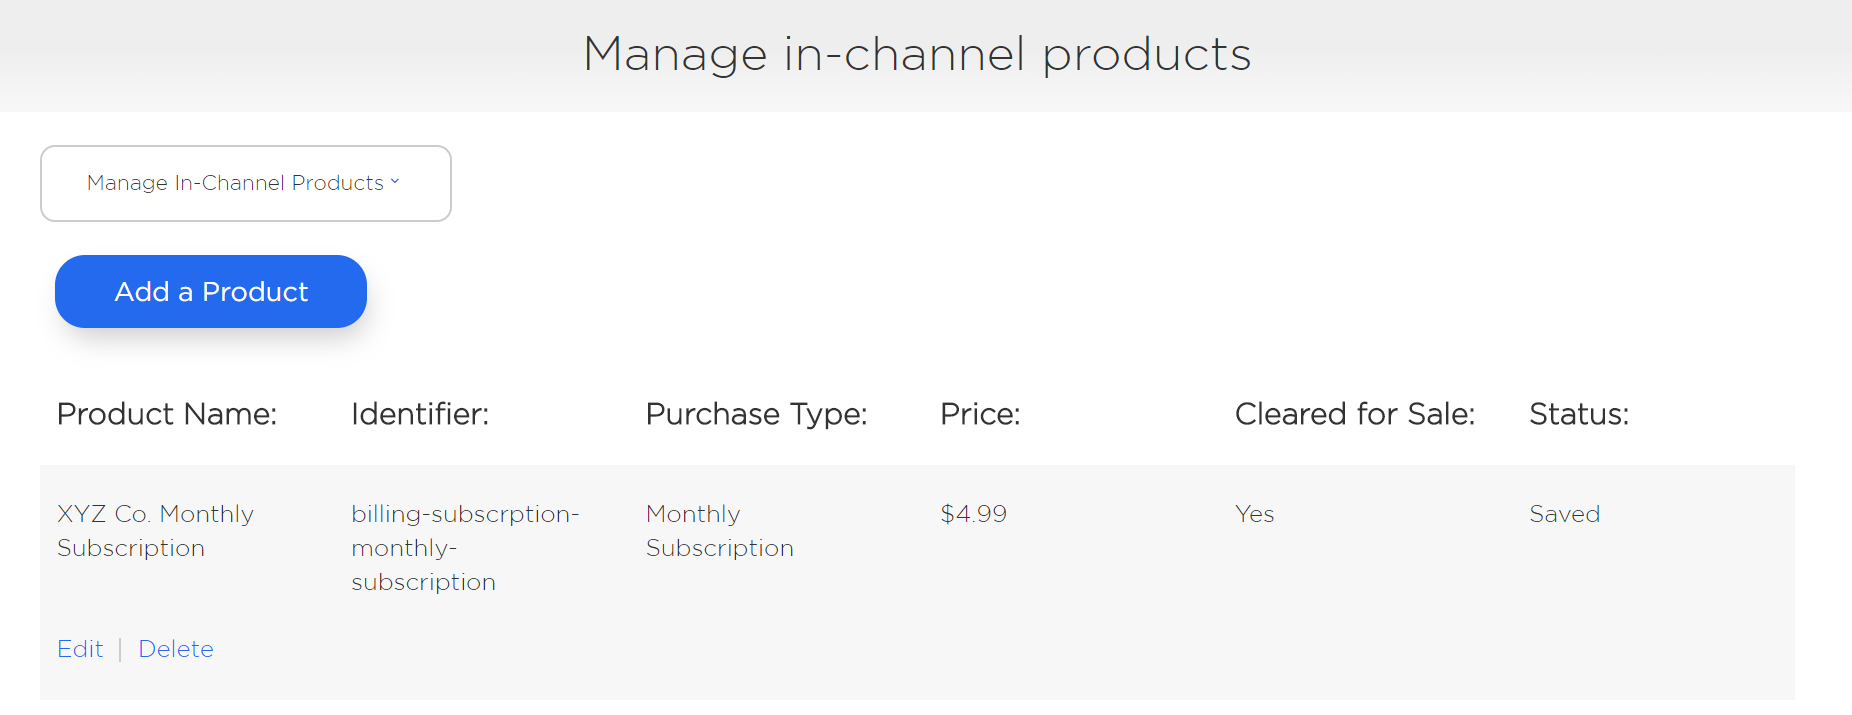
Once on the Manage in-channel products screen, select Add a Product. If you have an in-channel product you added in the past, you can also choose to edit or delete it here.
Fields Define Your Product
When you add or edit a billing product, you will designate several fields that describe your product and define how, when, and where it will be displayed to users.
Sample of Fields
In the example above, the product XYX Co. has already been added and could be edited. If you choose Edit, you would see its fields.
Channel: XYZ Co.
Product Name: <Channel Name> + <Product Description>
Any invoice emails your customers receive along with their purchase history will display the Product Name. Including the channel name is critical in making purchases more easily identifiable. The name is limited to 30 characters.
Identifier: billing-subscription-monthly-subscription
Purchase Type: Monthly Subscription
Quantity: 1
Classification: Video
Internet Connection Required: Yes
Requires Additional Purchase: No
Cleared for Sale: Yes
Price Tier: 5
Descriptions of Fields
When you choose Add a Product, the screen Add an in-channel product displays. The first few fields listed allow you to choose the channels on which the product will be available and give the billing product a name. The product name is what users will see when they are billed.
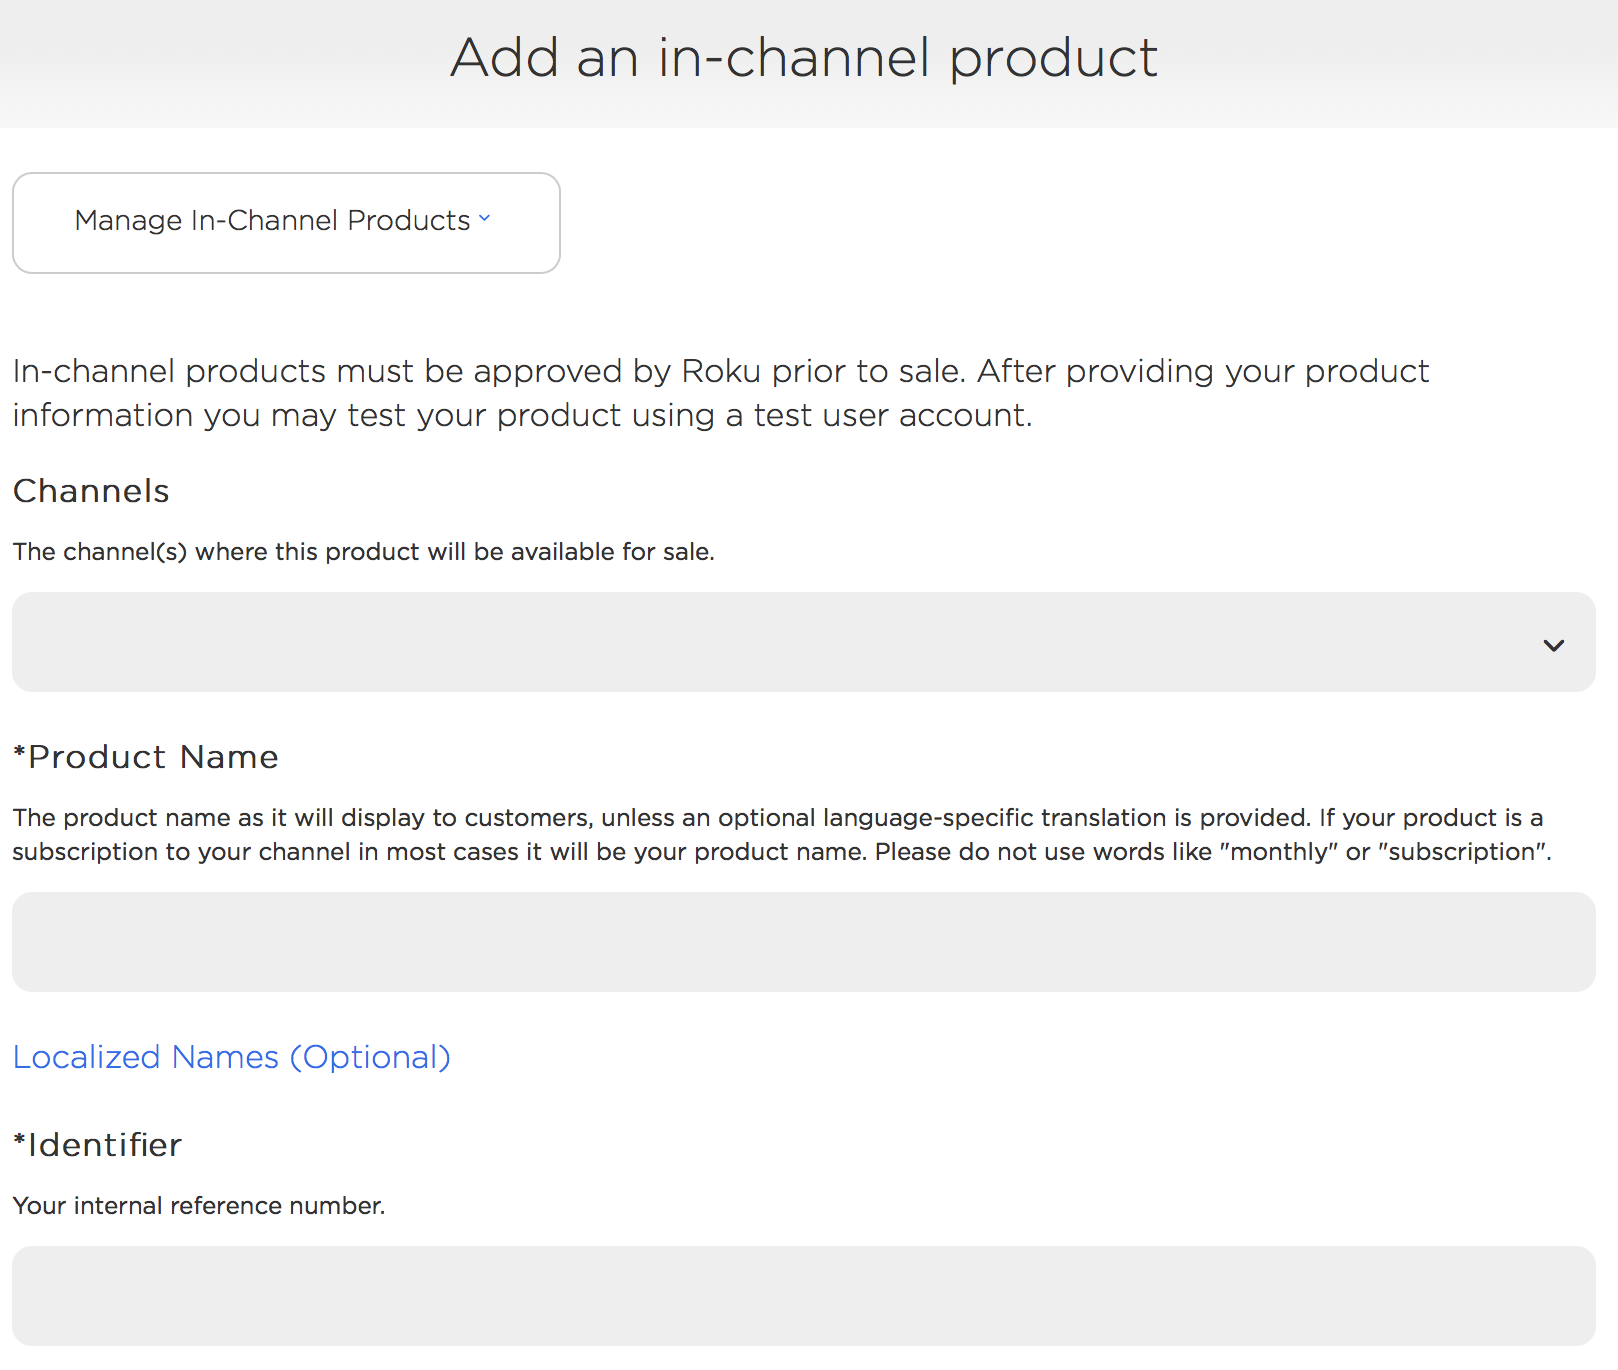
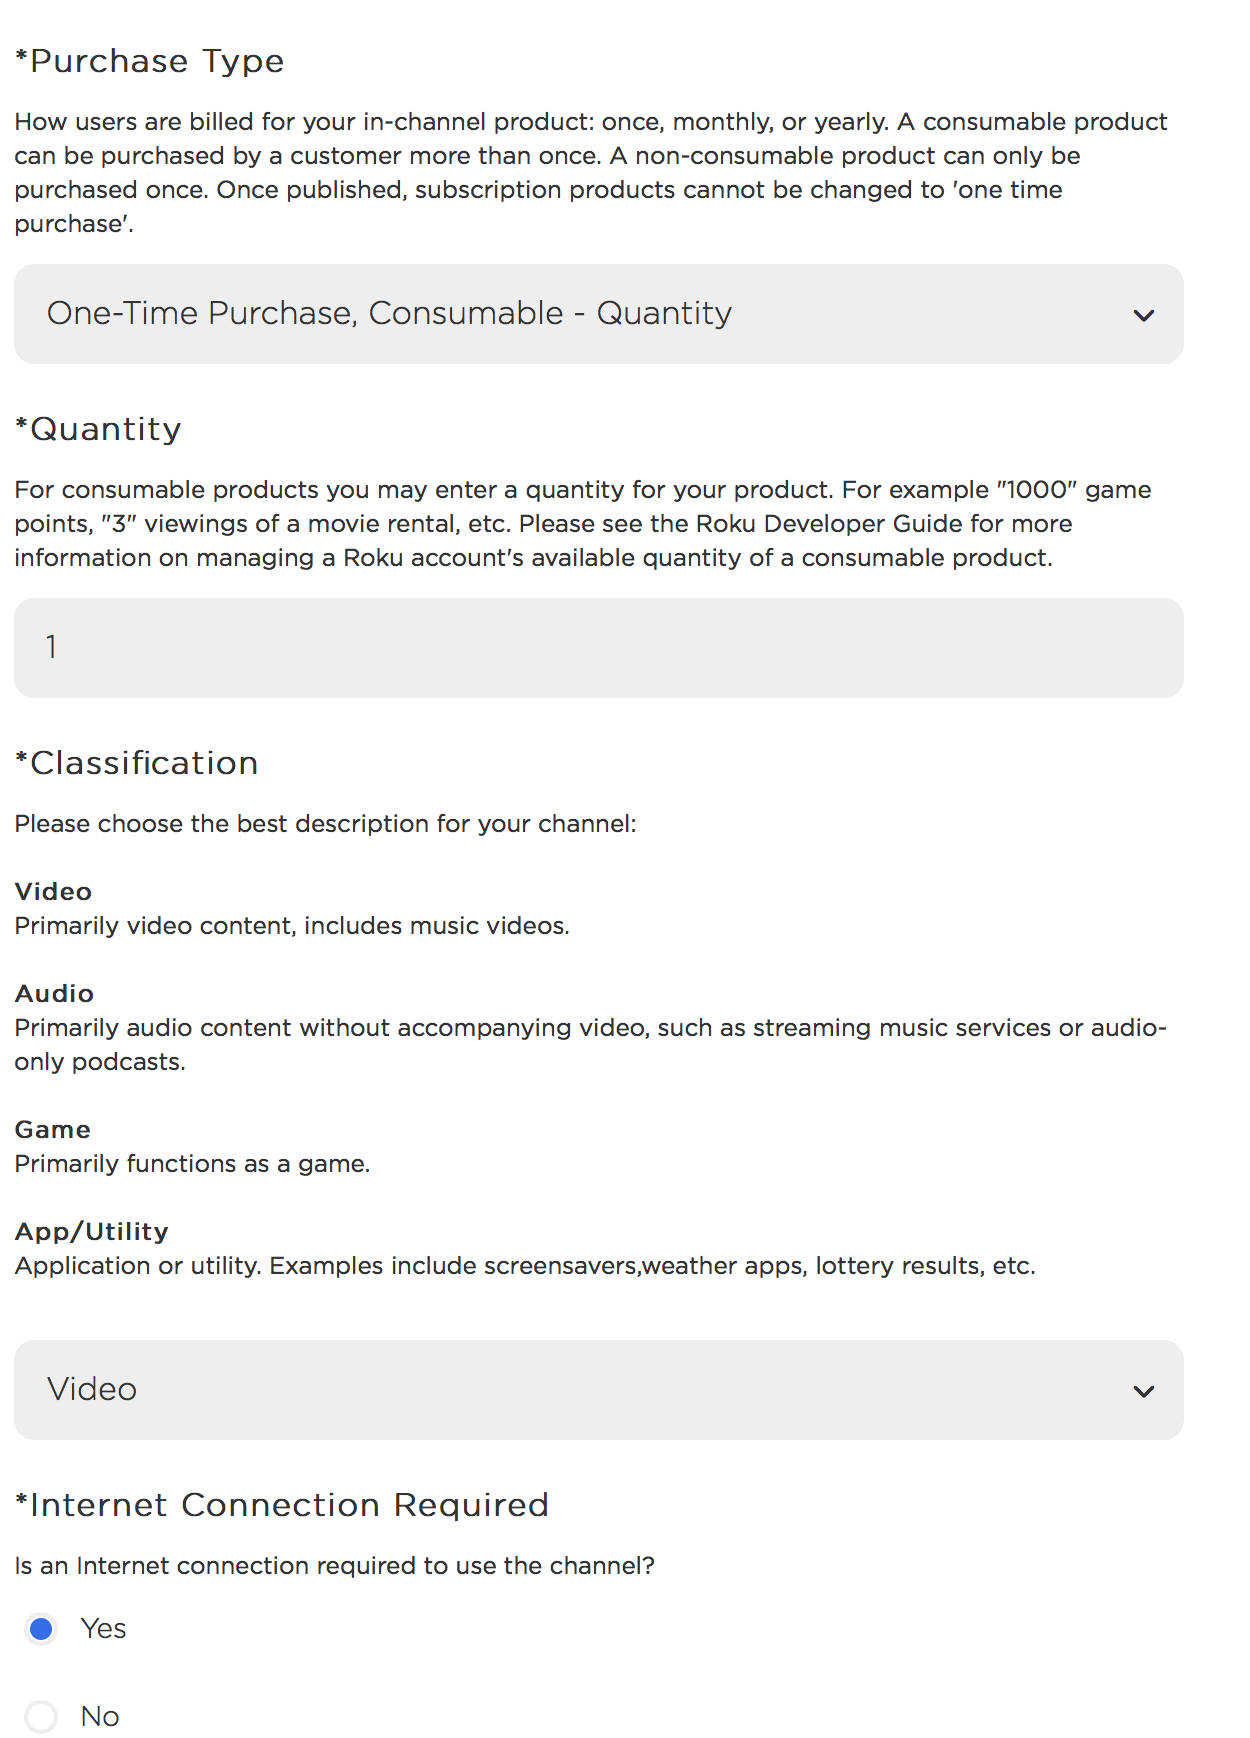
When scrolling down in the screen Add an in-channel product, the next set of fields define the type of product, quantity allowed for a user, the type of content in the channel or channels your product will appear in, and whether or not the Internet is required for the channels.
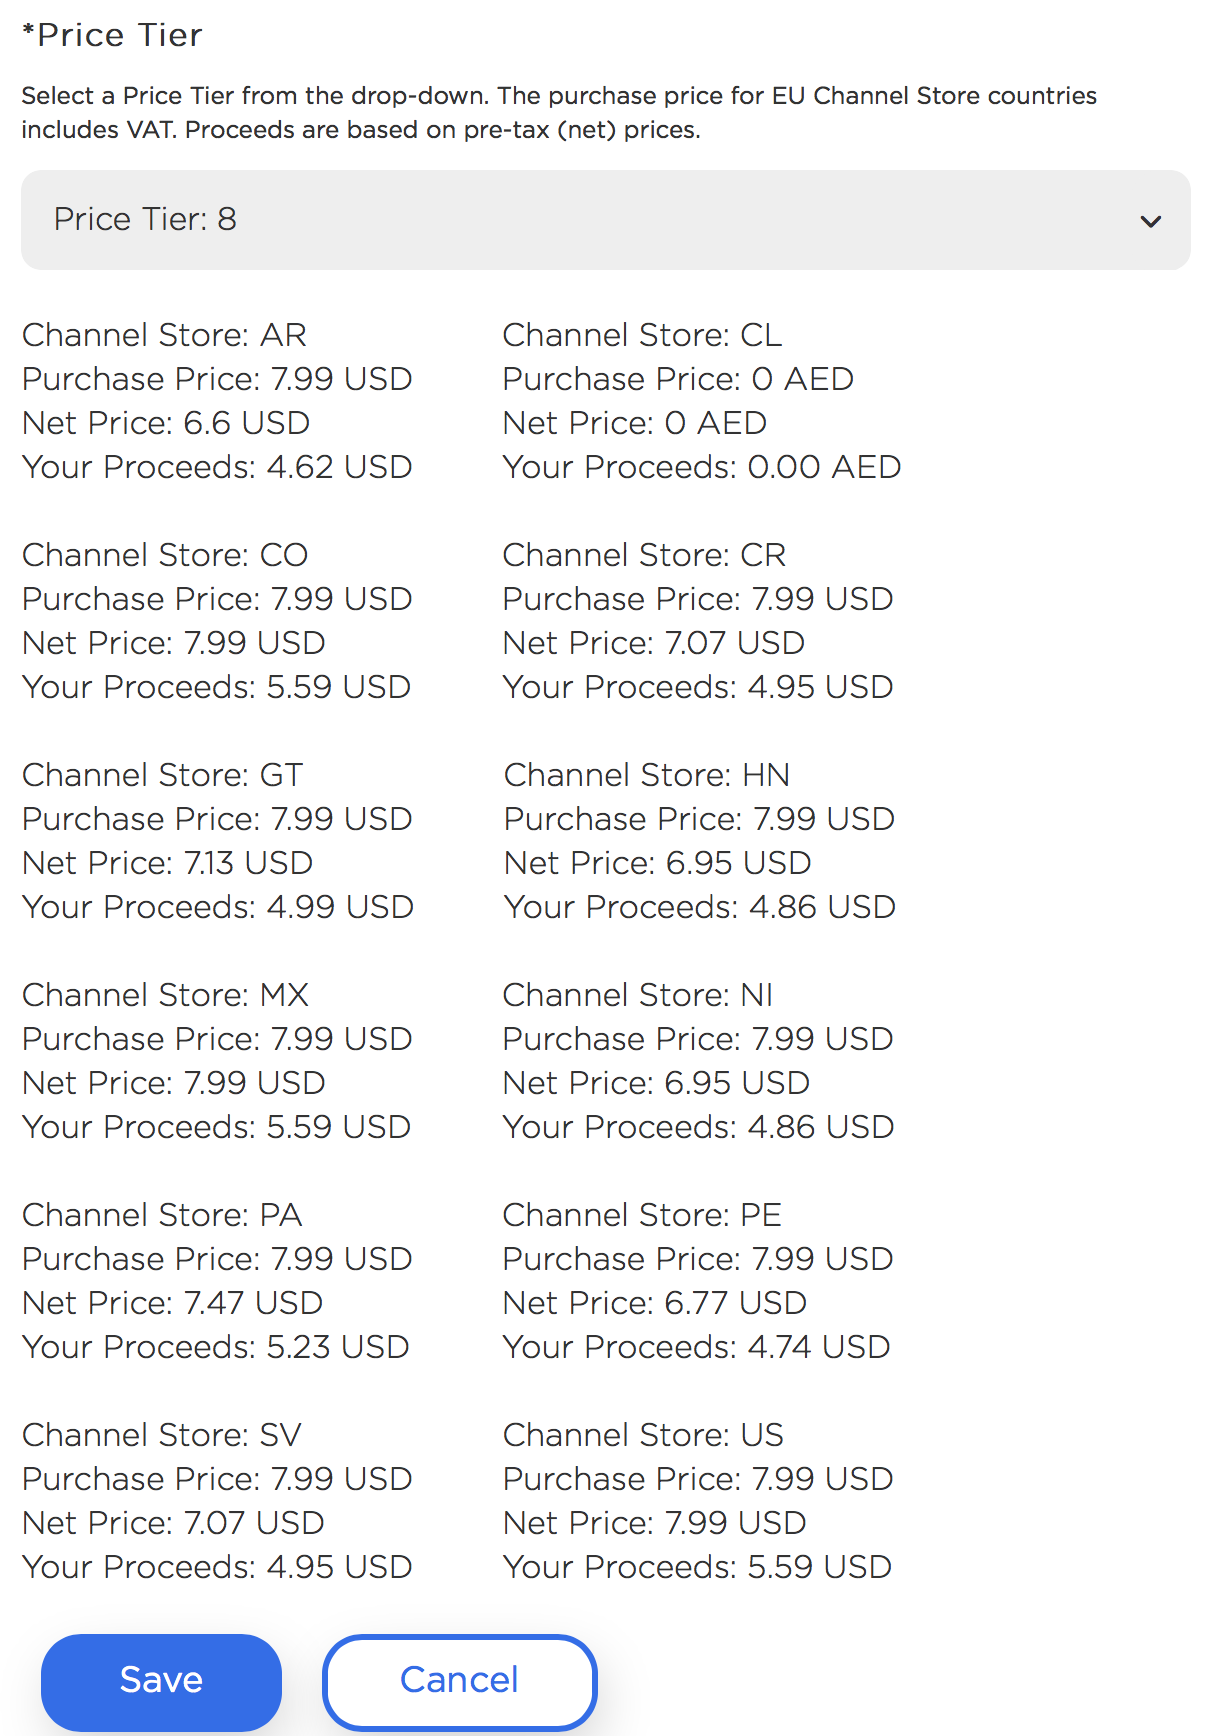
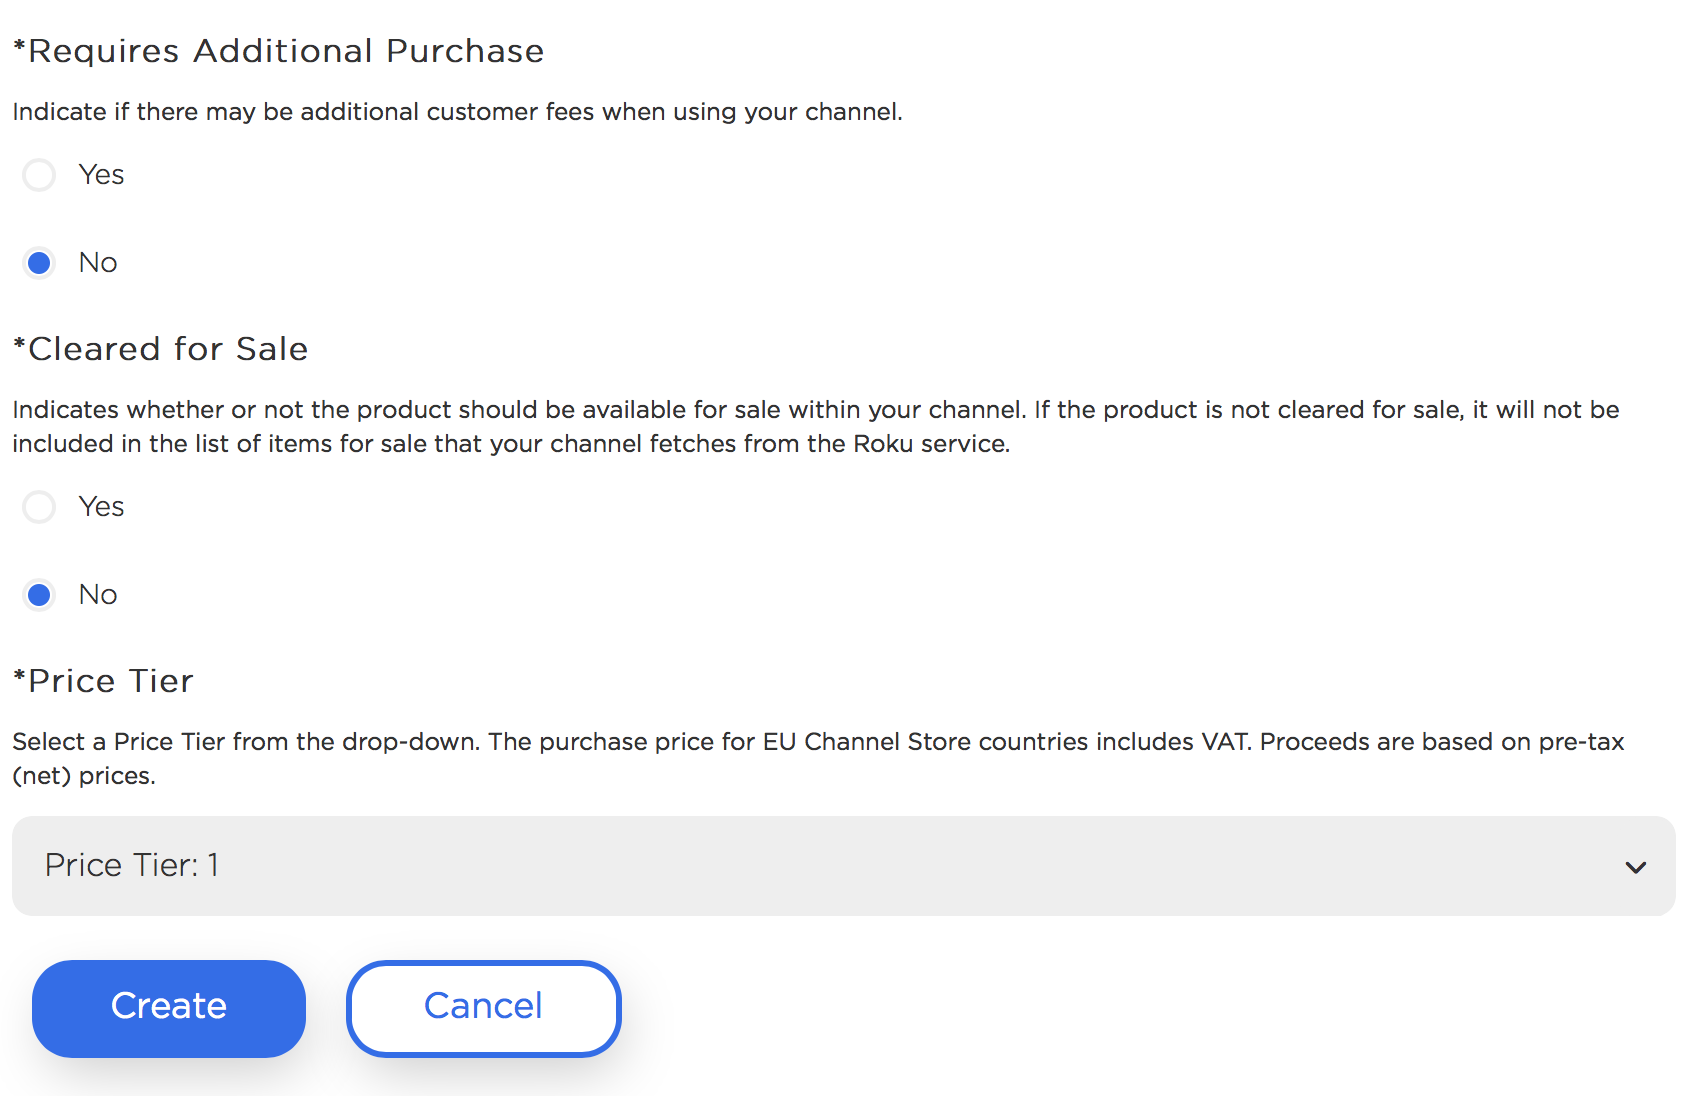
The last fields on the screen define purchasing details, such as whether other charges might be required, the final check on whether the product is available for sale, and the exact price for the product. The price tier is a drop-down of many prices you can choose from.
For example, some of the price tiers listed on the drop-down are:
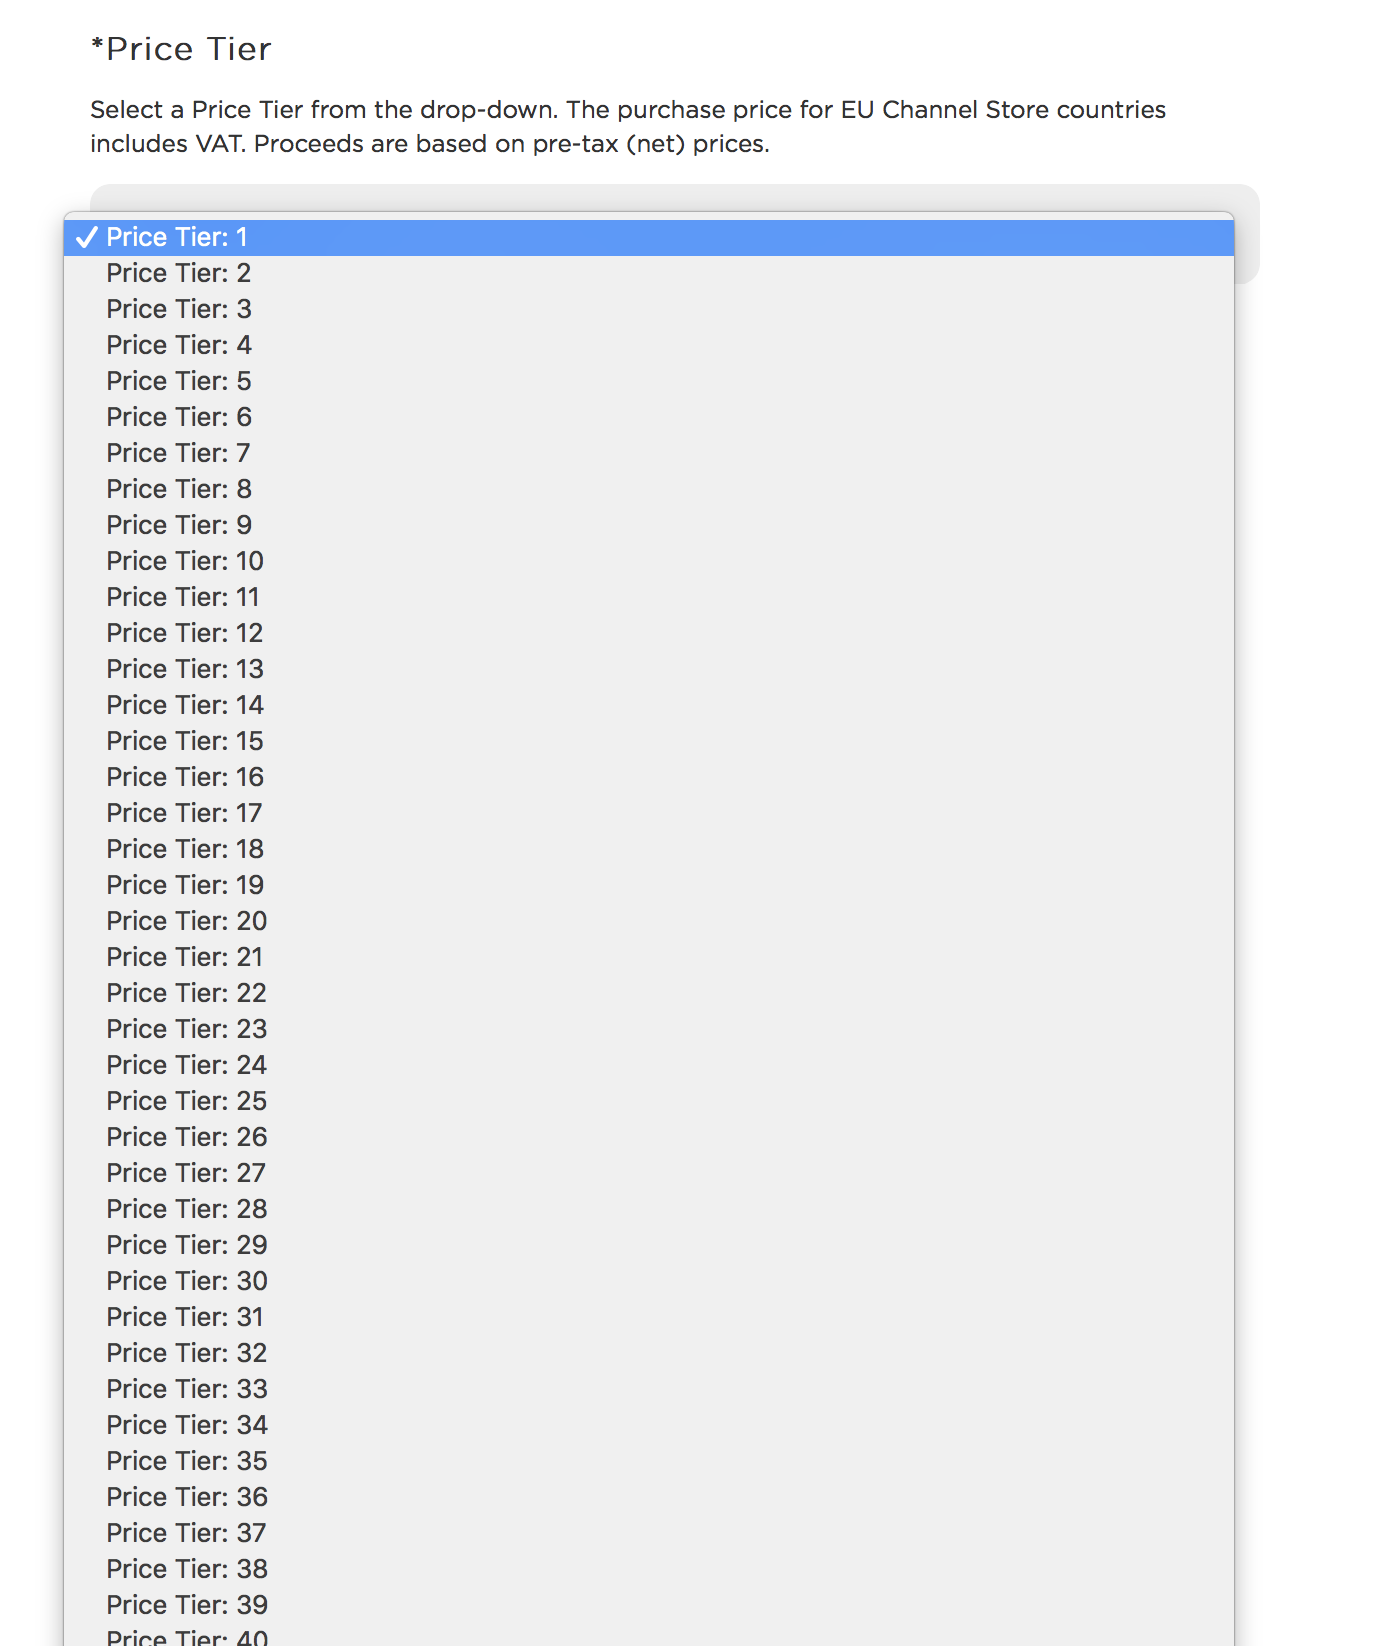
Each price tier equates to a different amount ranging from price tier 1 at $0.99 USD to price tier 200 at $349.99 USD. For example, price tier 8 charges the user $7.99: