Publishing on the Roku Channel Store requires several core items — such as source code, images, and fonts — to be "packaged." This enables developers to publish channels while keeping all intellectual property safely encrypted. The process of “packaging a channel” uses cryptographic hardware built into Roku devices and creates a package that can be easily distributed on Roku devices.
Table of Contents
Packaging with Eclipse
Packaging can be done in Eclipse using the Roku Plugin for Eclipse.
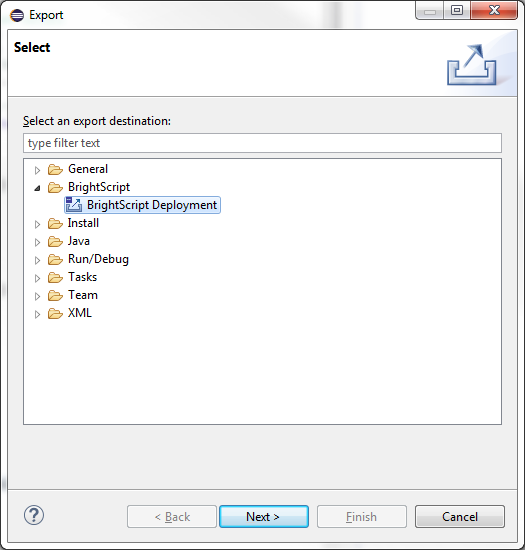
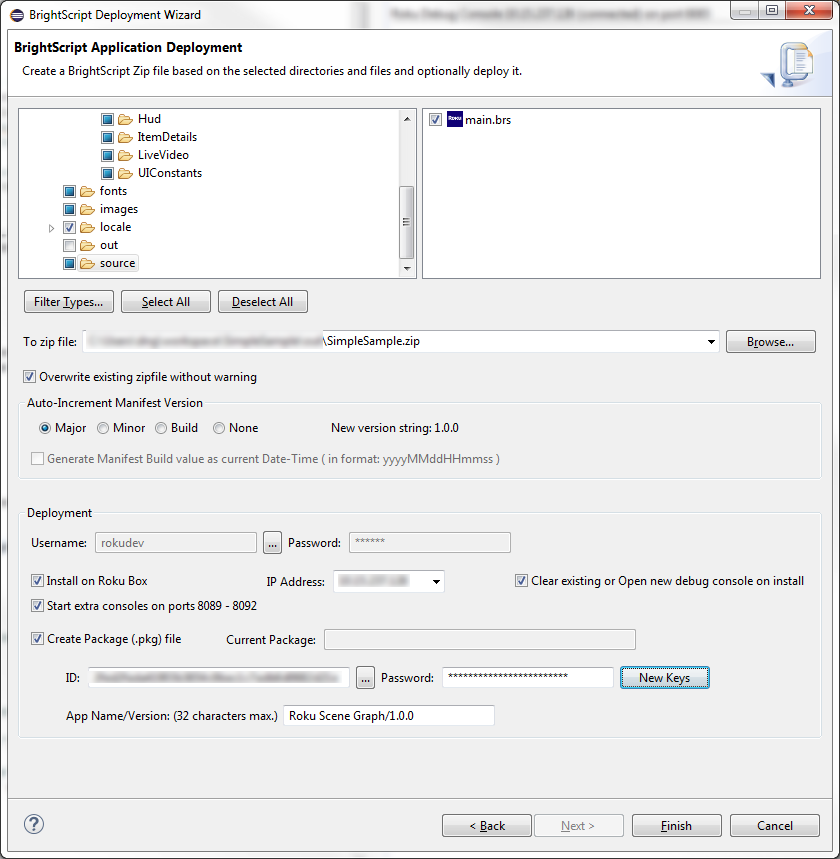
In an existing BrightScript project, select File > Export > BrightScript Deployment.
In the following dialog: click the check-box next to Install on Roku Box, and Create Package (.pkg) file. Click Finish and the package will be available in the out folder of the current BrightScript project in the Eclipse workspace.
If the genkey utility has not been run previously, click New Keys to generate a signing key.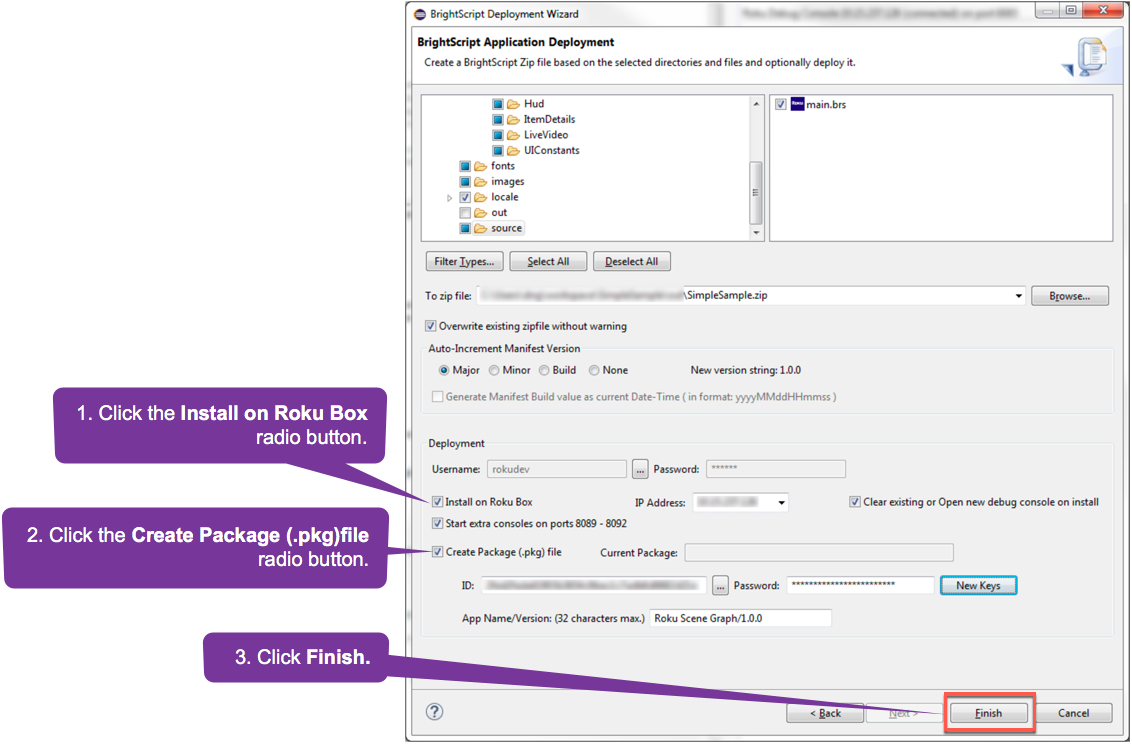
Packaging using the Package Utilities
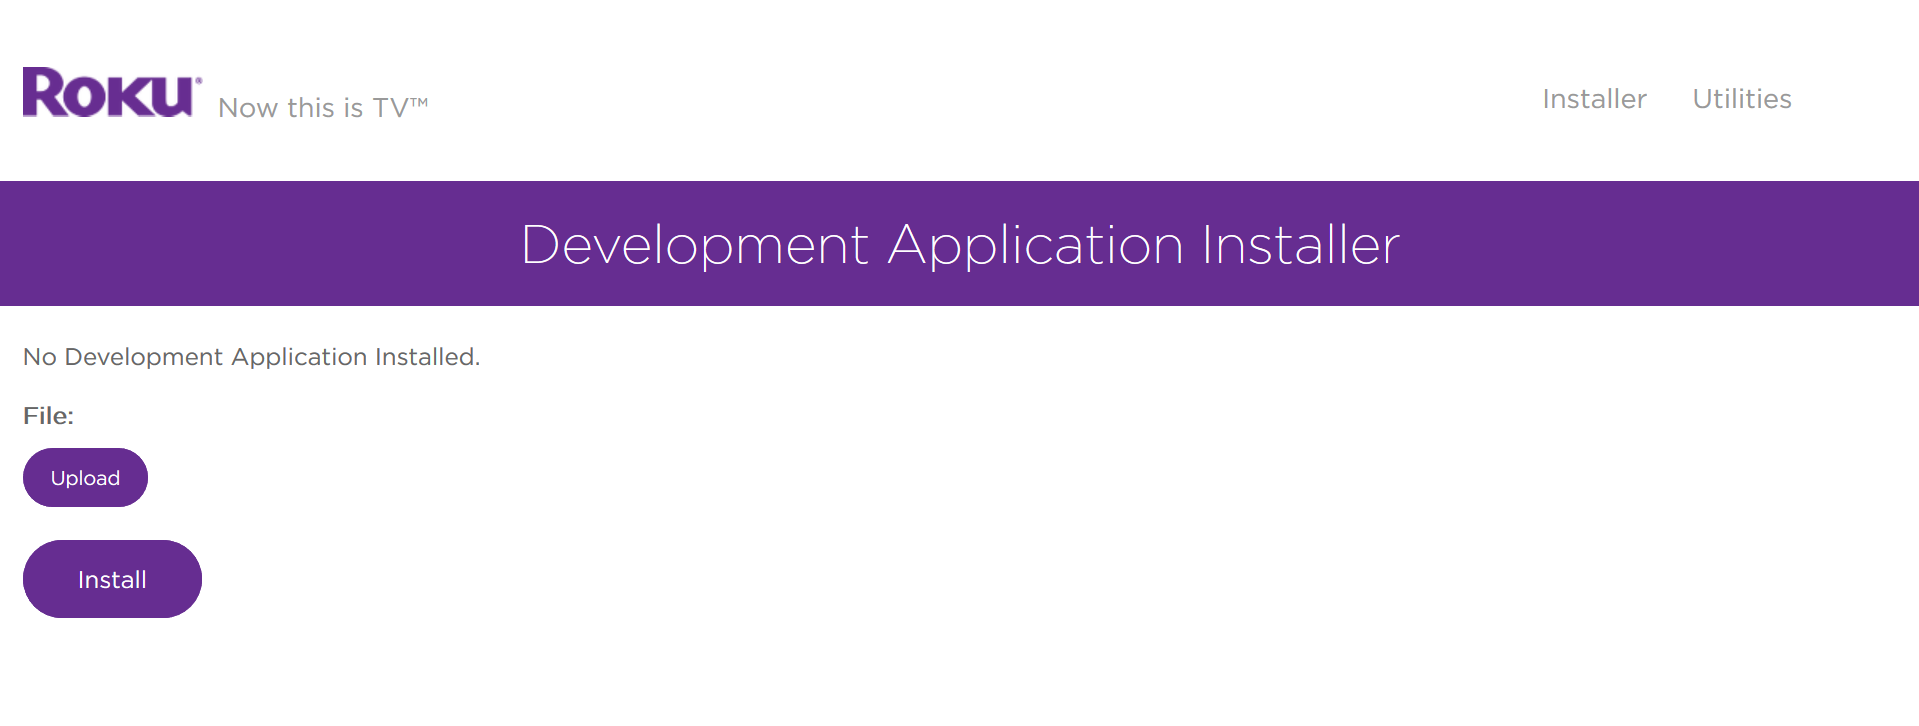
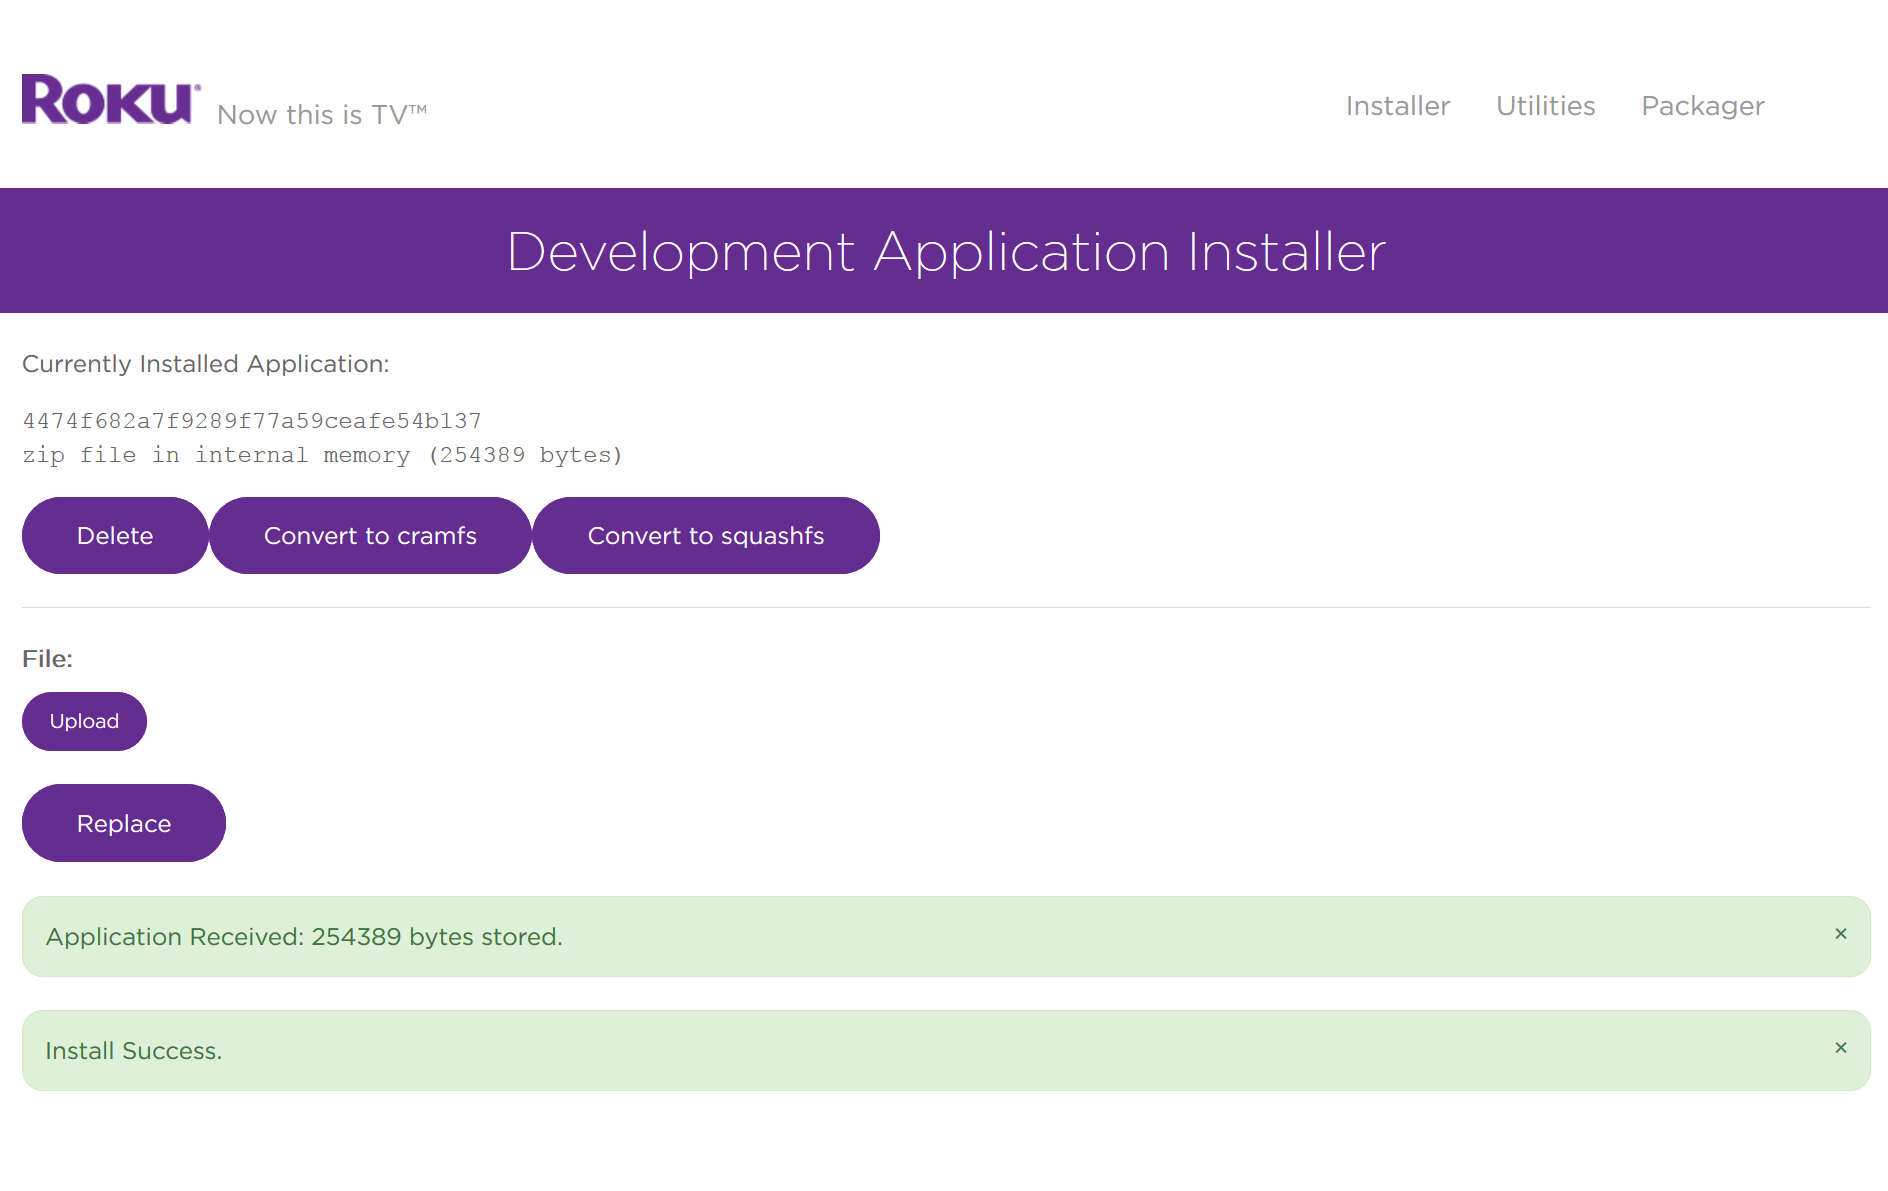
Step 1. Install (or “side-load”) channel on a Roku device
In addition to the Eclipse plugin, developers can use the package utilities located within the Development Application Installer.
Step 2. Open a telnet session
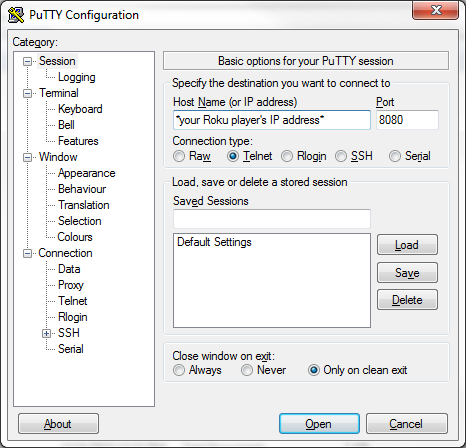
Once you have the channel side-loaded onto a Roku device, you’ll need to generate a key to sign your package. Windows developers can use a telnet client such as PuTTY, while OSX/Linux developers can use the built-in client through terminal.
- Windows: In PuTTY, enter the
IP addressof your Roku player,8080for the port, andTelnetas the connection type.
Windows Instructions:
- Download the telnet client PuTTY.
- Enter the IP address of your Roku player.
- Use "8080" for the Port
- Click the Telnet radio button for the Connection Type.

OSX/Linux Instructions
- : Open terminal and type:
telnet <Roku-IP-address> 8080
Step 3. Run the genkey utility to create a signing key
- Type
genkeyinto the command prompt/terminal and wait for the process to complete. If the prompt says “Command not recognized,” type it again.

Upon completion, a key has been successfully generated to sign packages.
Make note of the developer ID and password as it will be required in the next step (and anytime the code is updated and needs to be repackaged).
It is a good practice to generate a new signing key for each channel created unless you explicitly want to share registry information between channels.
Step 4. Packaging the side-loaded channel
Return to the Developer Application Installer. There should now be a Packager option available. If this option is not available, go through the previous step and run genkey again.
Cramfs is a file system format that loads faster than zip. Use cramfs for firmware versions 7.7 and lower. Squashfs is a file format that saves flash storage space and it decompresses faster. Note that squashfs works only for firmware 8.0 and above. Make sure you set a minFirmware dependency of v8.0 or higher when uploading a squashfs pkg to the Roku Channel Store.

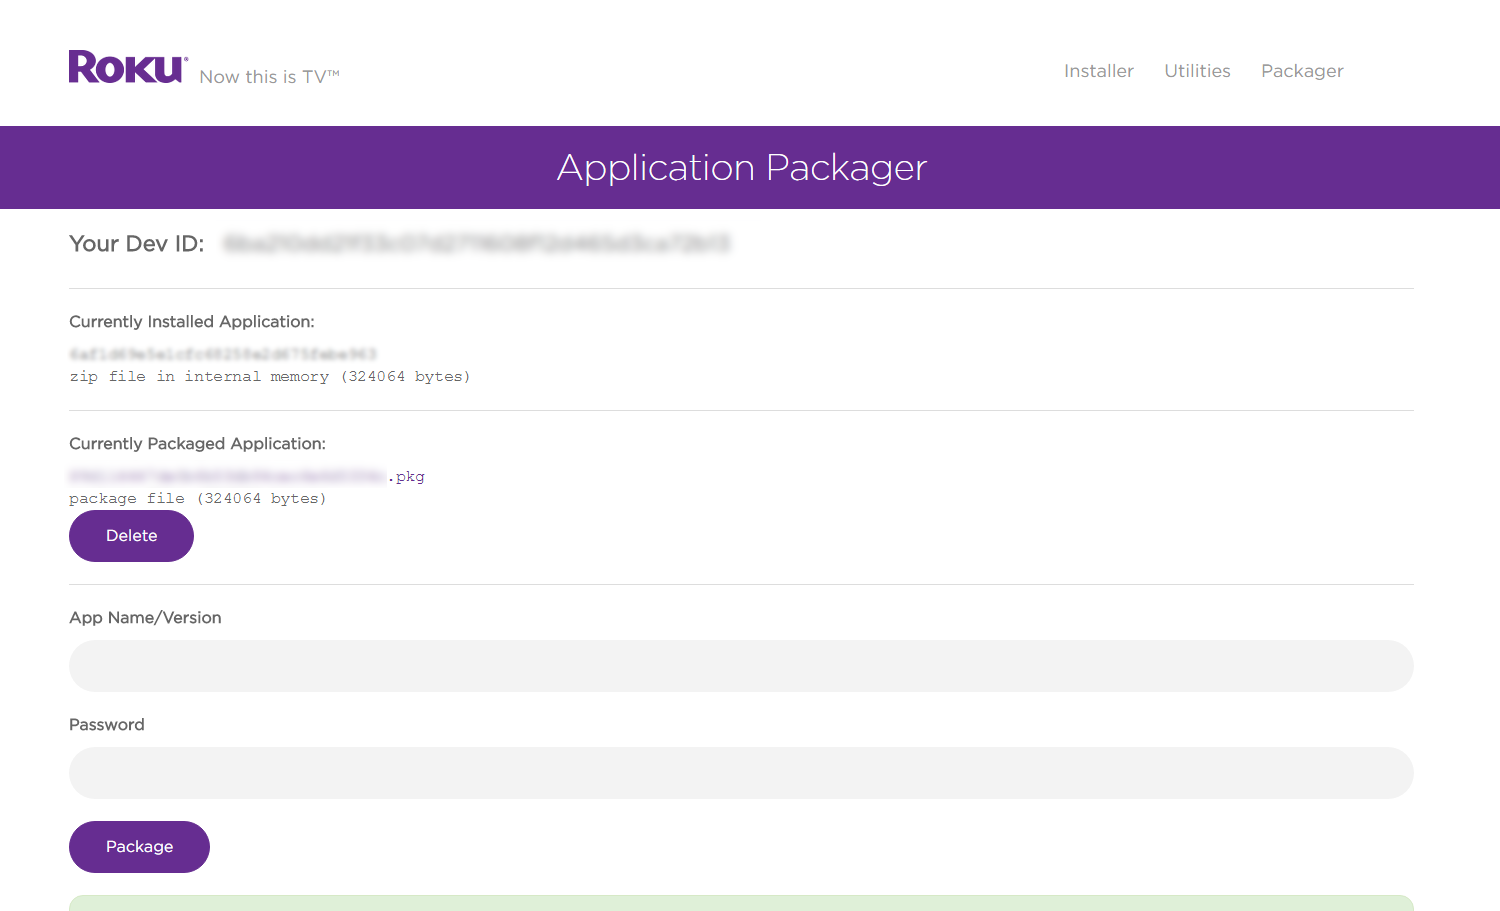
Click on Packager to bring up the Application Packager window. The Dev ID should match the same developer ID that was generated with genkey.
Enter an App Name/Version, and enter the Password created from the genkey utility.
Click Package.
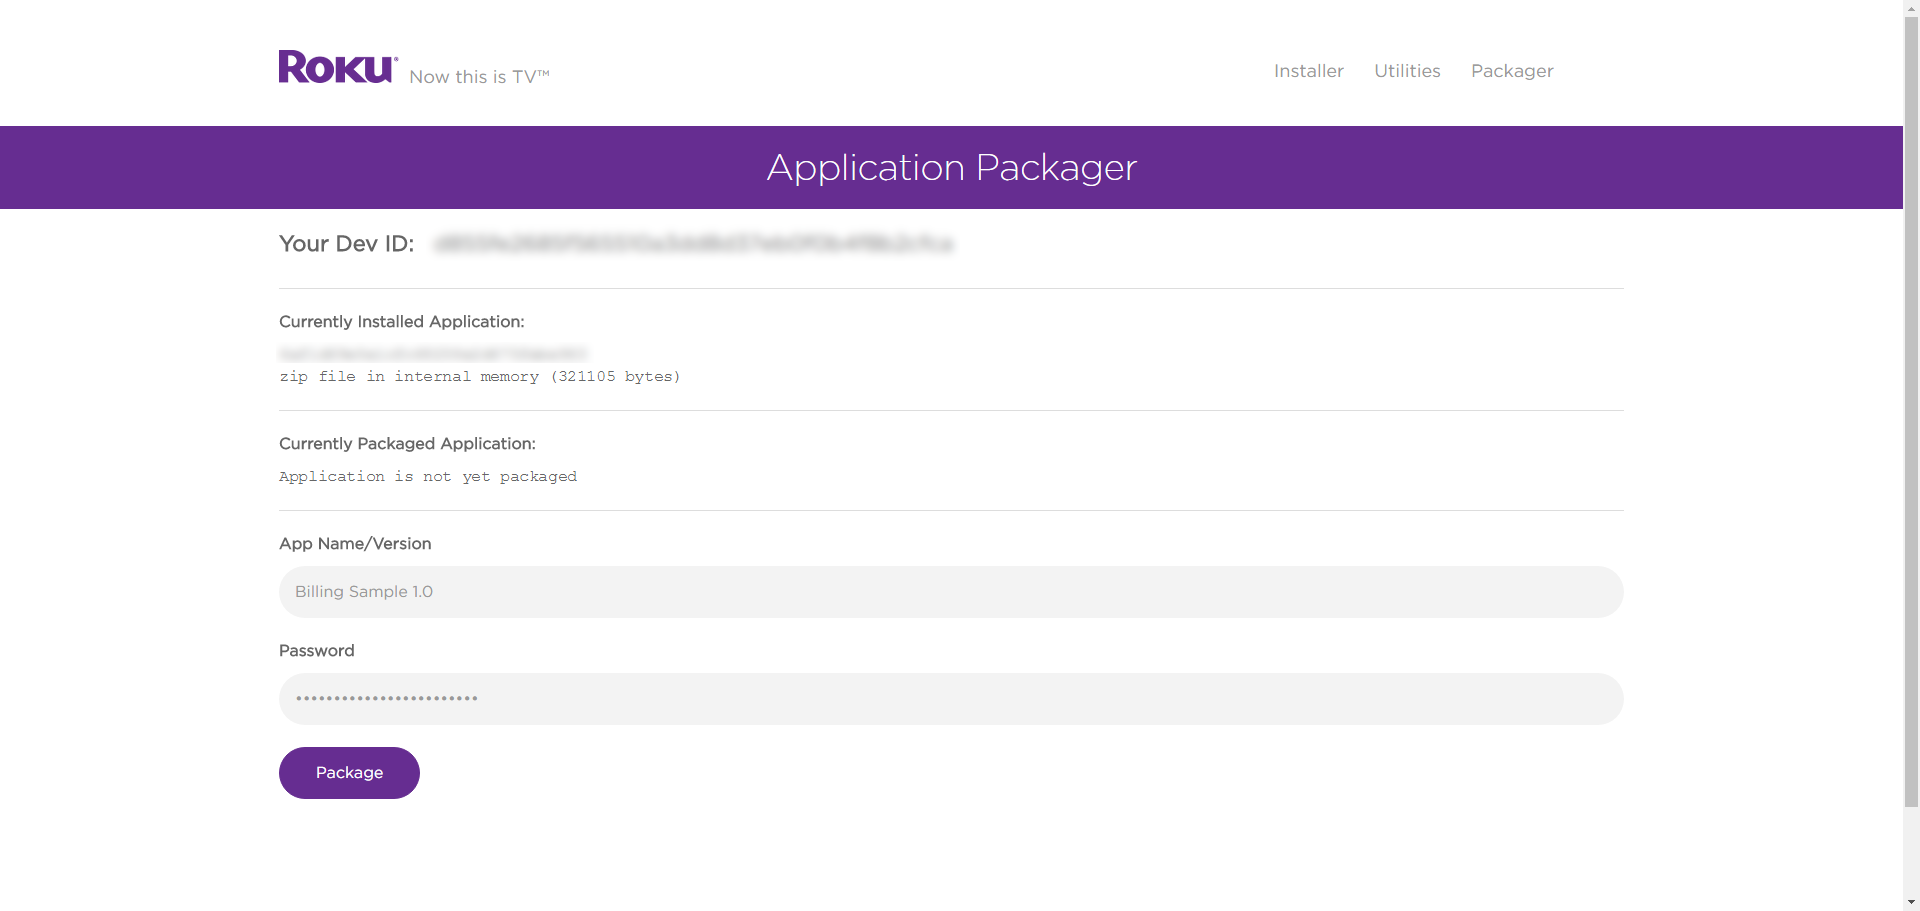
The following window will appear displaying the Currently Packaged Application. that the package is now available. the signed package can be downloaded using the .pkg link.
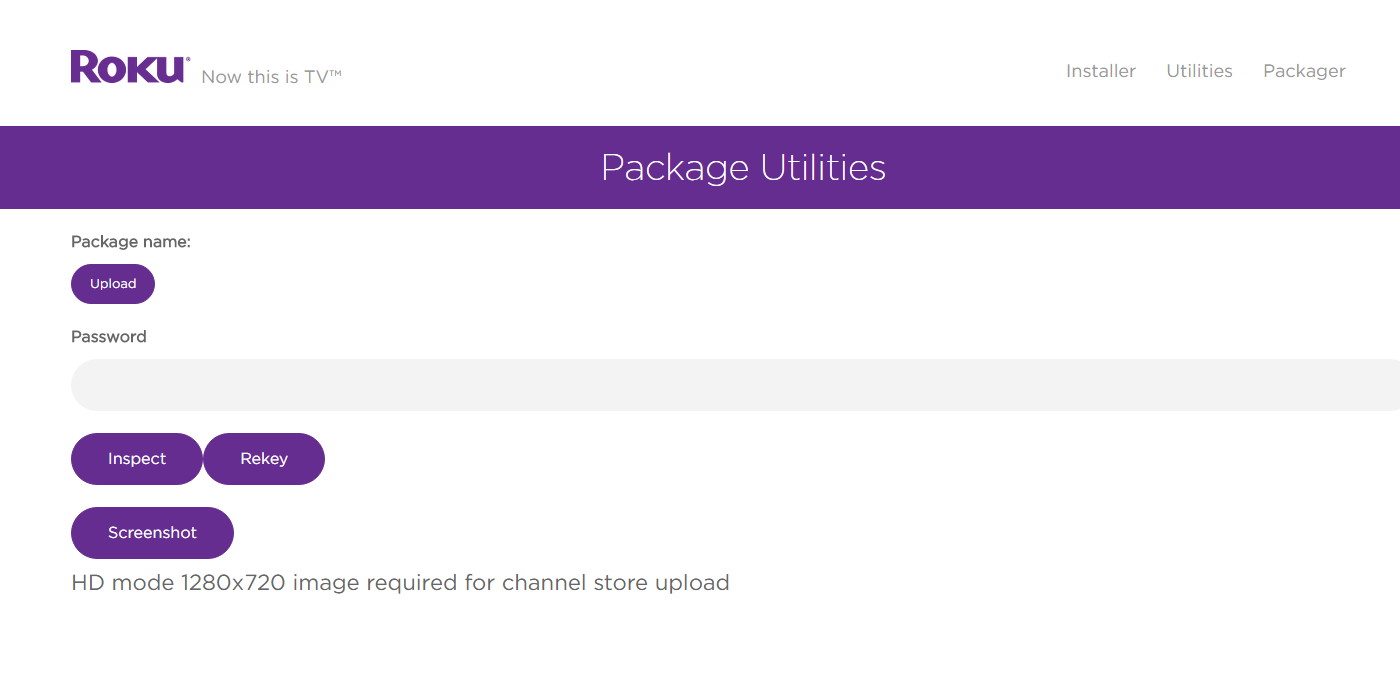
Rekeying
When developing multiple applications, it is good practice to sign each package with a different key. This ensures registry entries are not shared between channels. To sign different packages on the same device, it will have to be rekeyed.
- In the Development Application Installer, click Utilities. This will open the following Package Utilities window.
Click Upload to select the signed package you would like to use to rekey the player.
Enter the password from genkey that matches the key used for the signed package
Click Rekey.
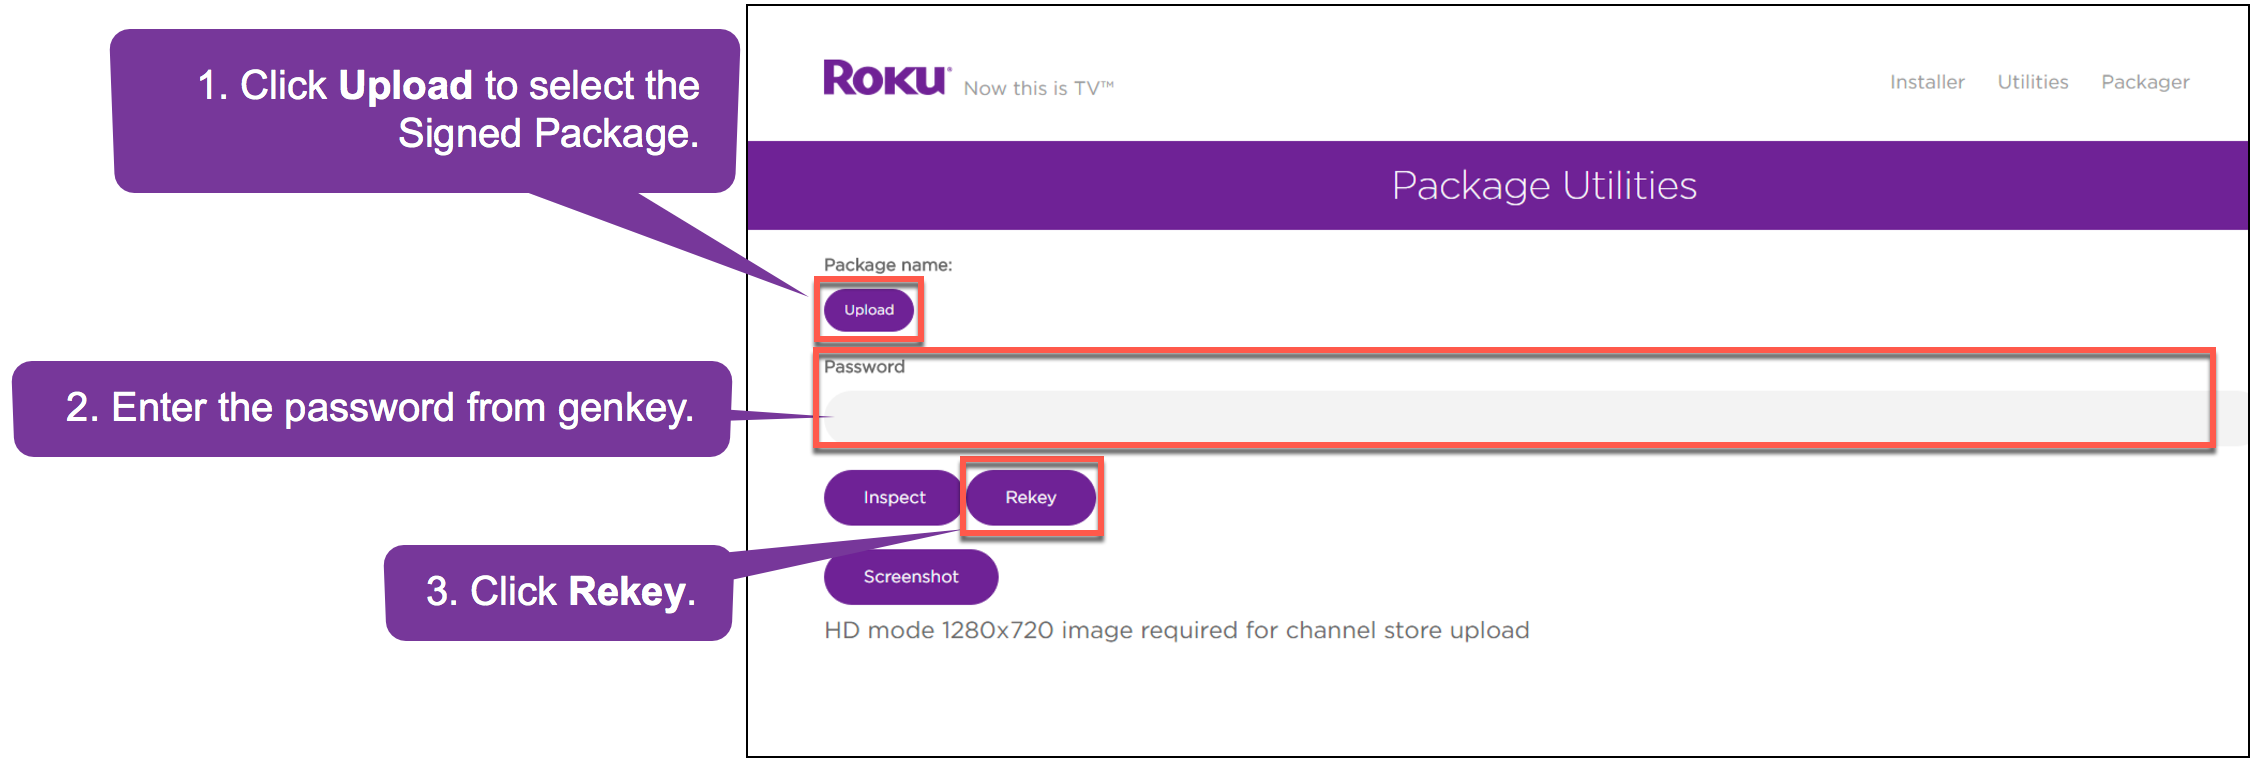
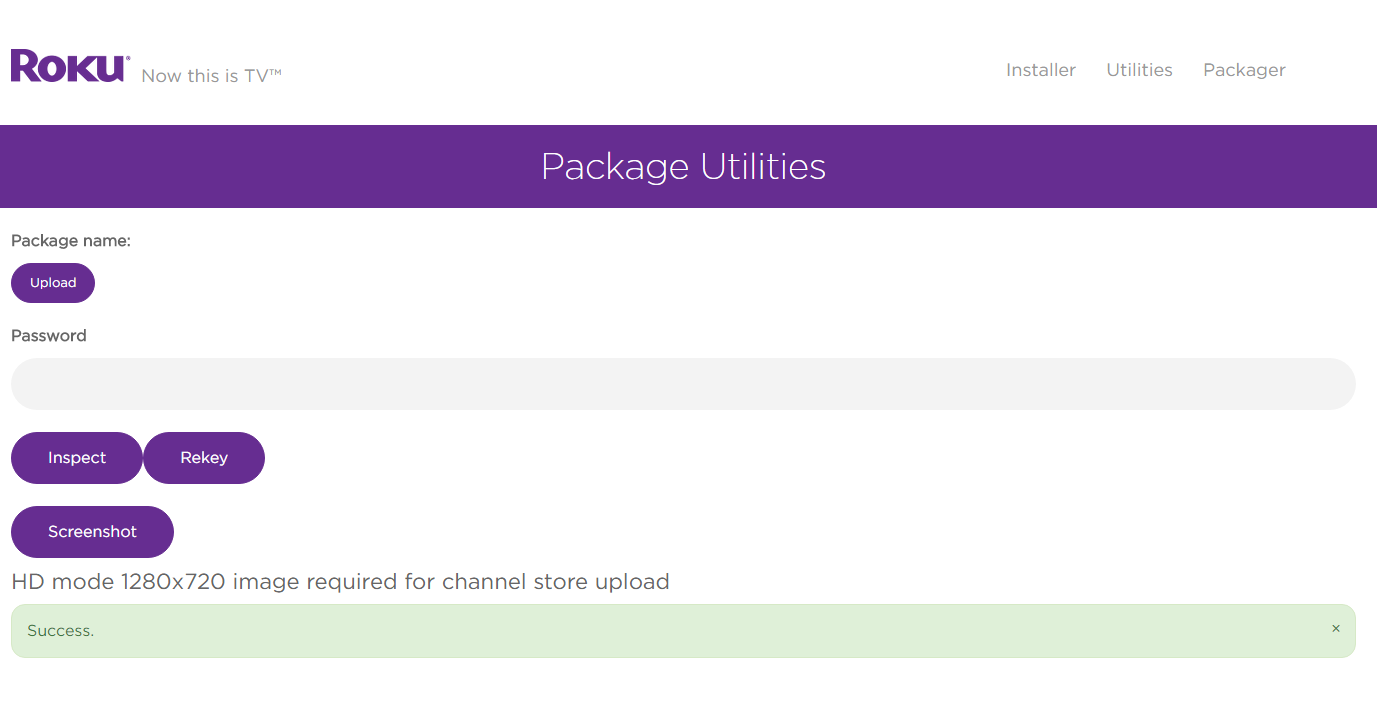
A success message will be displayed when the process is complete as seen in the following window.