Table of Contents
There are some important node classes that are the key to reading your content catalog data from your server into your Roku SceneGraph application. Once you understand how to use these node classes, you'll be able to synchronize your server database with any Roku SceneGraph application. And there are some other node classes that can be used to time actions in a Roku SceneGraph application, as well as add some alpha channel effects to decorate your application.
Here are the node classes we'll be looking at:
- Timer
ContentNode
Task
MaskGroup
Timer Markup
Example Application: TimerExample.zip
Node Class Reference: Timer
The Timer node class is a simple way to add a time delay to selected operations. Just add a Timer node, observe the fire field, and write a callback function for the operation you want to be delayed, or in some way timed:
<component name = "TimerExample" extends = "Scene" >
<script type = "text/brightscript" >
<![CDATA[
sub init()
m.top.backgroundURI = "pkg:/images/rsgde_bg_hd.jpg"
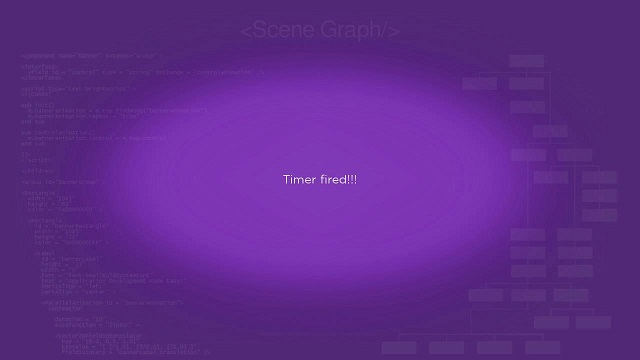
m.defaulttext = "Wait for it, wait for it..."
m.alternatetext = "Timer fired!!!"
m.label = m.top.FindNode("exampleLabel")
m.label.text = m.defaulttext
m.textchange = false
examplerect = m.label.boundingRect()
centerx = (1280 - examplerect.width) / 2
centery = (720 - examplerect.height) / 2
m.label.translation = [ centerx, centery ]
timer = m.top.findNode("exampleTimer")
timer.ObserveField("fire", "changetext")
timer.control = "start"
m.top.setFocus(true)
end sub
sub changetext()
if (m.textchange = false) then
m.label.text = m.alternatetext
m.textchange = true
else
m.label.text = m.defaulttext
m.textchange = false
end if
end sub
]]>
</script>
<children>
<Label
id = "exampleLabel"
width = "480"
height = "60"
horizAlign = "center"
vertAlign = "center" />
<Timer
id = "exampleTimer"
repeat = "true"
duration = "2" />
</children>
</component>
The XML component markup above will change the text on the screen every two seconds, because the changtext() callback function is triggered the each time the Timer node fire field changes.
ContentNode Markup
Example Application: ContentNodeExample.zip
Node Class Reference: ContentNode
The ContentNode node class largely replaces associative arrays as a method of storing and passing data items to Roku SceneGraph application screens. The ContentNode node class is designed to use the descriptive and playback attributes listed in Content Meta-Data, and like all SceneGraph node classes can be extended to use custom attributes not found in Content Meta-Data, by creating a custom <interface> element with fields for the extended class attributes.
But generally, every attribute you need to describe and play media content items can be found and used in Content Meta-Data. Let's look at just how easy it is to get Content Meta-Data attributes into a SceneGraph ContentNode node.
In the contentnodescene.xml component file in ContentNodeExample.zip, note that there is a typical SceneGraph XML markup in the <children> element, with one difference: there is a ContentNode node at the bottom of the SceneGraph:
<ContentNode id = "exampleContentNode" >
  <ContentNode title = "Renderable Nodes" />
  <ContentNode title = "Z-Order/Parent-Child" />
  <ContentNode title = "Animations" />
  <ContentNode title = "Events and Observers" />
  <ContentNode title = "Typography" />
  <ContentNode title = "Control Nodes" />
  <ContentNode title = "Lists and Grids" />
  <ContentNode title = "Dialogs" />
  <ContentNode title = "Widgets" />
  <ContentNode title = "Layout/Groups" />
  <ContentNode title = "Sliding Panels"  />
  <ContentNode title = "Media Playback" />
</ContentNode>
This simple ContentNode node contains 12 children ContentNode nodes, each of which only has one Content Meta-Data descriptive attribute: title (see Content Meta-Data). However, each child ContentNode node could have any number of the attributes listed in Content Meta-Data, or even custom attributes for an extended ContentNode node set as fields in a <interface> element.
The contentnodescene.xml component file in ContentNodeExample.zip demonstrates how to use BrightScript in the <script> element to get the child ContentNode node attributes, and use them in an application:
sub init()
  m.top.backgroundURI = "pkg:/images/rsgde_bg_hd.jpg"

  m.top.setFocus(true)

  m.item = m.top.findNode("itemLabel")

  m.item.font.size = m.item.font.size+5

  example = m.top.findNode("exampleDisplay")
  examplerect = example.boundingRect()
  centerx = (1280 - examplerect.width) / 2
  centery = (720 - examplerect.height) / 2
  example.translation = [ centerx, centery ]

  m.content = m.top.findNode("exampleContentNode")
  m.contentitems = m.content.getChildCount()
  m.currentitem = 0

  showcontentitem()
end sub

sub showcontentitem()
  itemcontent = m.content.getChild(m.currentitem)
  m.item.text = itemcontent.title
end sub

function onKeyEvent(key as String, press as Boolean) as Boolean
  if press then
    if key = "OK"
      m.currentitem++

      if (m.currentitem = m.contentitems)
        m.currentitem = 0
      end if

      showcontentitem()

      return true
    end if
  end if

  return false
end function
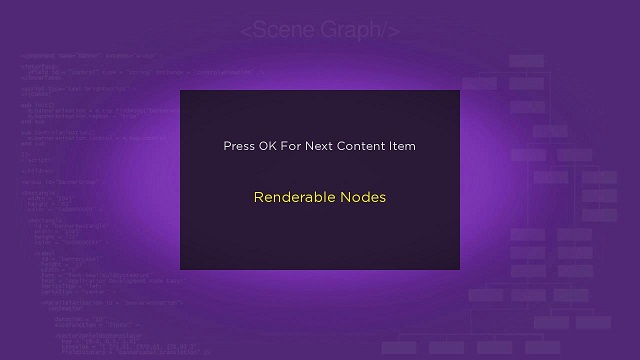
This BrightScript code shows the following scene:

When you press the remote control OK key, the next child ContentNode node data item is shown. The key to this is using the getChild() method, with the m.currentitem object as the argument, using the object value as an index into the ContentNode node children:
sub showcontentitem() itemcontent = m.content.getChild(m.currentitem) m.item.text = itemcontent.titleend sub
Then the Content Meta-Data title attribute can be assigned to the text field of the itemLabel Label node created in the <children> element. The remainder of the code in the <script> element is used to initialize this operation, most notably by using the getChildCount() method to determine the number of ContentNode node child nodes, and then using the onKeyEvent() function to respond to OK key presses by cycling through the ContentNode node child node index numbers.
Task Markup
Example Application: TaskExample.zip
Node Class Reference: Task
The Task node class allows the application to launch an asynchronous thread. The most common use of the Task node class is as a content reader, where the application launches an asynchronous thread that performs an HTTP transfer of a JSON/XML (or other data storage format) file from your server, then converts the returned file to a ContentNode node. By setting a field observer for the completed ContentNode node created by the Task node, your application can use this ContentNode node created in the background thread as soon as it is ready to control the layout and behavior of your application, without blocking other SceneGraph rendering operations in the interim.
To demonstrate the basic principles of this content reader Task node implementation, we're going to read an XML file with the exact same content meta-data as used in ContentNode Markup above, and use it in exactly the same way in the application:
Again, every remote control OK key press shows the next ContentNode node child node data item. The big difference is how the ContentNode node is generated. In this example, the ContentNode is generated by launching an asynchronous Task node thread to read an XML file containing the Content Meta-Data attributes for each data item, and create a ContentNode node that contains child ContentNode nodes for each data item.
To do this, we need a separate component file for the Task node, contentreader.xml.
<component name = "ContentReader" extends = "Task" >

  <interface>
    <field id = "contenturi" type = "uri" />
    <field id = "content" type = "node" />
  </interface>

  <script type = "text/brightscript" >

    <![CDATA[

    sub init()
      m.top.functionName = "getcontent"
    end sub

    sub getcontent()
      content = createObject("roSGNode", "ContentNode")

      contentxml = createObject("roXMLElement")

      readInternet = createObject("roUrlTransfer")
      readInternet.setUrl(m.top.contenturi)
      contentxml.parse(readInternet.GetToString())

      if contentxml.getName()="Content"
        for each item in contentxml.GetNamedElements("item")
          itemcontent = content.createChild("ContentNode")
          itemcontent.setFields(item.getAttributes())
        end for
      end if

      m.top.content = content
    end sub

    ]]>

  </script>

</component>
For this example, you should look at the server XML file with the Content Meta-Data (named xmlcontent.xml):
http://www.sdktestinglab.com/Tutorial/content/xmlcontent.xml
The xmlcontent.xml file is:
<?xml version = "1.0" encoding = "utf-8" standalone = "yes" ?>

<!--********** Copyright 2016 Roku Corp.  All Rights Reserved. **********-->

<Content >
  <item title = "Renderable Nodes" />
  <item title = "Z-Order/Parent-Child" />
  <item title = "Animations" />
  <item title = "Events and Observers" />
  <item title = "Typography" />
  <item title = "Control Nodes" />
  <item title = "Lists and Grids" />
  <item title = "Dialogs" />
  <item title = "Widgets" />
  <item title = "Layout/Groups" />
  <item title = "Sliding Panels"  />
  <item title = "Media Playback" />
</Content>
Note that this file uses the Content Meta-Data attribute title. This makes the conversion to a ContentNode node in contentreader.xml easier because we can use the setFields() method to set all the fields of a child ContentNode node by using the XML parsing getAttributes() call as the argument. If the XML item attributes do not match the Content Meta-Data attributes (or custom attribute fields for an extended ContentNode node), each XML item attribute must be set explicitly in the content reader XML parsing loop to Content Meta-Data attributes.
But the first thing that's mandatory for a content reader Task node component file is a custom <interface> element:
<interface> <field id = "contenturi" type = "uri" /> <field id = "content" type = "node" /></interface>
These two custom fields allow an application to launch an asynchronous content reader thread, by specifying the URI of the XML (or other format) file with the Content Meta-Data in the contenturi field, and then waiting for the ContentNode node to be fully constructed by the thread by observing the content field.
Note that the last thing done in the getcontent() function in contentreader.xml is to set the m.top.content field to the ContentNode node that is now fully constructed from the item attributes in the XML file specified by the m.top.contenturi field. This allows the application that launched the Task node thread to observe the content field, to trigger a callback function to use the ContentNode node data items that drives the application appearance and behavior.
If you look at the contentnodescene.xml component file in ContentNodeExample.zip (see ContentNode Markup), and compare it to the taskscene.xml component file in TaskExample.zip, you'll notice they are very similar except for launching the content reader Task node, and the callback function triggered when the Task node completes the ContentNode node:
sub init()
  ...
  m.readXMLContentTask = createObject("roSGNode", "ContentReader")
  m.readXMLContentTask.observeField("content", "setcontent")
  m.readXMLContentTask.contenturi = "http://www.sdktestinglab.com/Tutorial/content/xmlcontent.xml"
  m.readXMLContentTask.control = "RUN"
  ...
end sub

sub setcontent()
  m.content = m.readXMLContentTask.content
  m.contentitems = m.content.getChildCount()
  m.currentitem = 0
  showcontentitem()
end sub
First, the Task node content reader asynchronous task object is created as m.readXMLContentTask. Then the content field of the Task node is observed, and the location of the XML file containing the Content Meta-Data attributes for each of the data items is set as the Task node contenturi field. Then the control field of the Task node is set to "RUN", launching the asynchronous thread.
When the ContentNode node created by the Task node is complete, the setcontent() callback function is triggered by the change in the Task node content field. The completed ContentNode node in the content field is then assigned to the application m.content object, and from there the same application operations occur as in ContentNodeExample.zip, as described in ContentNode Markup.
MaskGroup Markup
Example Application: MaskGroupExample.zip
Node Class Reference: MaskGroup
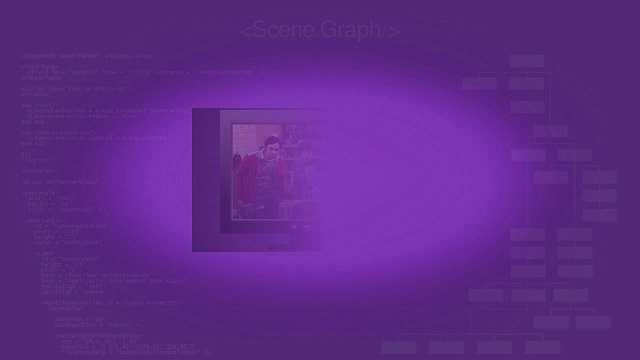
The MaskGroup node class allows you to overlay a PNG image on a child node tree, to create alpha channel fading, and other types of image rendering effects, of the child node tree. The pixels of the MaskGroup node image are blended with the pixels of the child node tree to create these effects. Typically you might want to use the MaskGroup node for a decorative effect such as having a list or grid fade out at the bottom of the screen. You should avoid using a MaskGroup node for any purpose that is essential to conveying information to the user, since the MaskGroup node only works on certain Roku devices with the OGL (or equivalent) libraries. On Roku devices without the OGL (or equivalent) libraries, the MaskGroup node will have no effect.
As an example, MaskGroupExample.zip uses a mask image with a smooth grayscale ramp from white to black, from the left to the right of the image. We'll use a simple Poster node image as the child node tree to be masked. The example sets the mask image size to the same size as the child image it will overlay in the masksize field, and sets the maskOffset field to position the mask image completely off the child image to the right.
Then the example uses an animation to move the mask image to the left over the child image, causing the child image to gradually fade out completely from right to left, and then moves the mask back to reverse the effect:
<?xml version = "1.0" encoding = "utf-8" ?>

<!--********** Copyright 2016 Roku Corp.  All Rights Reserved. **********-->

<component name = "MaskGroupExample" extends = "Scene" >

  <script type="text/brightscript" >

    <![CDATA[

    sub init()
      m.top.backgroundURI = "pkg:/images/rsgde_bg_hd.jpg"

      example = m.top.findNode("examplePoster")

      examplerect = example.boundingRect()
      centerx = (1280 - examplerect.width) / 2
      centery = (720 - examplerect.height) / 2
      example.translation = [ centerx, centery ]

      maskgroupanimation = m.top.findNode("MaskGroupAnimation")
      maskgroupanimation.control = "start"

      m.top.setFocus(true)
    end sub

    ]]>

  </script>

  <children>

    <MaskGroup
      id = "exampleMaskGroup"
      masksize = "[ 512, 288 ]"
      maskOffset = "[ -512, 0 ]"
      maskuri = "pkg:/images/grad_lin_l2r_hd.png" >

      <Poster
        id = "examplePoster"
        width = "512"
        height = "288"
        uri = "http://sdktestinglab.com/Tutorial/images/videopg.jpg" />

    </MaskGroup>

    <Animation
      id = "MaskGroupAnimation"
      duration = "3"
      easeFunction = "linear"
      repeat = "true" >

      <Vector2DFieldInterpolator
        id = "interpolator"
        fieldToInterp = "exampleMaskGroup.maskOffset"
        key = "[ 0.0, 0.50, 1.0 ]"
        keyValue = "[ [-512,0], [512,0], [-512,0] ]" />

    </Animation>

  </children>

</component>
The example is set to repeat the animation endlessly until it is clear how the MaskGroup node works...or you can simply note that the maskOffset field controls the amount of the mask image that is overlaid on the child node tree, and the masksize field controls the area the mask image will affect. For example, to fade out a large image or node tree at the bottom of a screen, you could use a similar mask image that ramps the grayscale smoothly from top to bottom. Then set the masksize field to the width of the entire screen, and about 100 pixels high, and the maskOffset field to 100 pixels in the vertical direction. The child image or node tree will fade out starting about 100 pixels from the bottom of the screen.
Or you can watch the MaskGroupExample.zip some more: