Table of Contents
As described in SceneGraph XML Reference, there are standard event loops and functions included in the SceneGraph API for triggering actions when certain events occur. The following are a few examples that illustrate how to perform actions in your application in response to certain events.
Observed Fields Markup
Example Application: EventObserverExample.zip
Node Class Reference: Timer
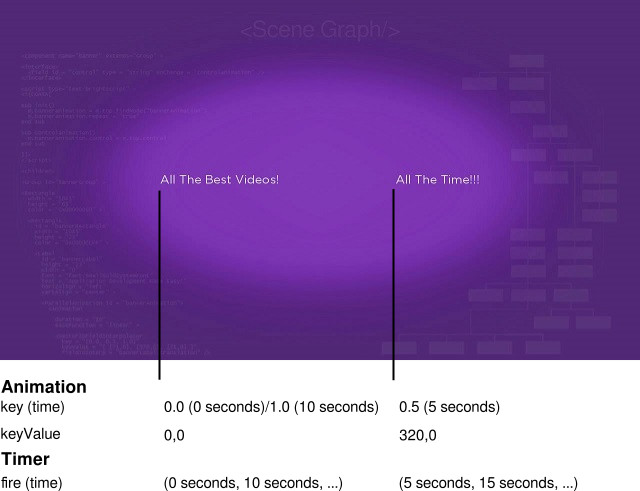
All SceneGraph objects include an observeField() function that can call an event handler function in response to a change in a field in the object (see ifSGNodeField). (As an alternate, the interface element also can also be used for the same purpose, as described in <interface>.) EventObserverExample.zip uses a Timer node to trigger a change in the text in a Label node we defined previously in Renderable Node Markup (to see a tutorial example of the Timer node, you can skip ahead a little to Timer Markup).
But we're going to make this more complicated by combining an animation node that also operates on the Label node with the Timer node. We're going to try to synchronize the Timer node with an animation node that operates on the translation field of the Label node, to change the text as well as move it around the display screen.
<component name = "EventObserverExample" extends = "Scene" >
<script type = "text/brightscript" >
<![CDATA[
sub init()
m.top.backgroundURI = "pkg:/images/rsgde_bg_hd.jpg"
example = m.top.findNode("textRectangle")
examplerect = example.boundingRect()
centerx = (1280 - examplerect.width) / 2
centery = (720 - examplerect.height) / 2
example.translation = [ centerx, centery ]
m.movinglabel = m.top.findNode("movingLabel")
scrollback = m.top.findNode("scrollbackAnimation")
texttimer = m.top.findNode("textTimer")
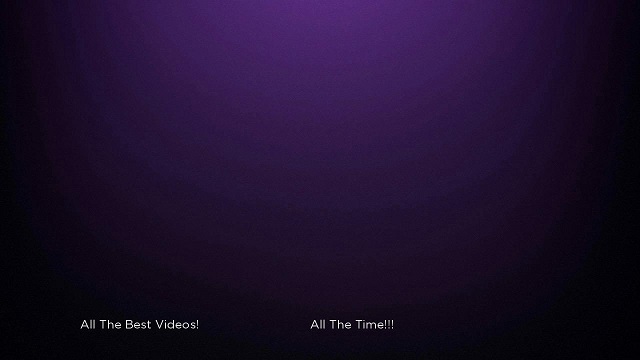
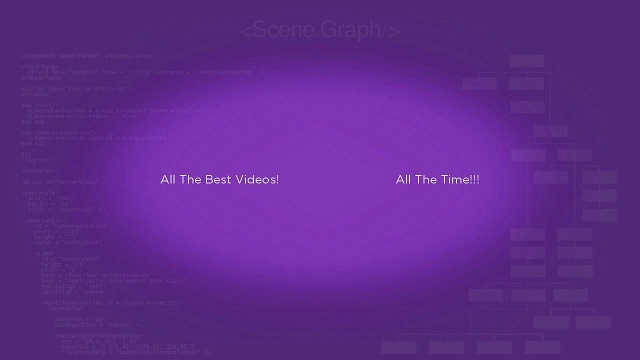
m.defaulttext = "All The Best Videos!"
m.alternatetext = "All The Time!!!"
m.textchange = false
texttimer.observeField("fire", "changetext")
scrollback.control = "start"
texttimer.control = "start"
m.top.setFocus(true)
end sub
sub changetext()
if (m.textchange = false) then
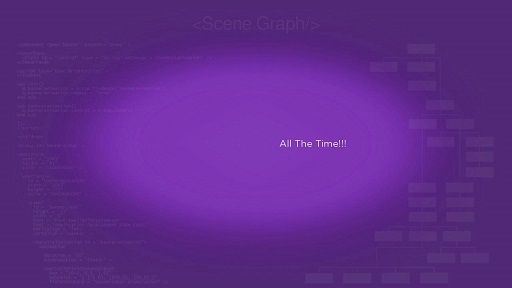
m.movinglabel.text = m.alternatetext
m.textchange = true
else
m.movinglabel.text = m.defaulttext
m.textchange = false
end if
end sub
]]>
</script>
<children>
<Rectangle
id = "textRectangle"
width = "640"
height = "60"
color = "0x10101000" >
<Label
id = "movingLabel"
width = "280"
height = "60"
text = "All The Best Videos!"
horizAlign = "center"
vertAlign = "center" />
</Rectangle>
<Animation
id = "scrollbackAnimation"
duration = "10"
repeat = "true"
easeFunction = "linear" >
<Vector2DFieldInterpolator
key = "[ 0.0, 0.5, 1.0 ]"
keyValue = "[ [0.0, 0.0], [360.0, 0.0], [0.0, 0.0] ]"
fieldToInterp = "movingLabel.translation" />
</Animation>
<Timer
id = "textTimer"
repeat = "true"
duration = "5" />
</children>
</component>
Note that we are setting up an animation that is very similar to the one in Vector2DFieldInterpolator Markup. But instead of moving a rectangle around the display screen, we are moving a Label node. We make the animated Label node a child node of an invisible parent Rectangle node that sets the boundary of the furthermost limits of the animation:
<Rectangle id = "textRectangle" width = "640" height = "60" color = "0x10101000" > <Label id = "movingLabel" width = "280" height = "60" text = "All The Best Videos!" horizAlign = "center" vertAlign = "center" /></Rectangle>
Then we define the Animation node to move the Label node around, which uses the same Vector2DFieldInterpolator node we used before to change the translation field values of a Rectangle node:
<Animation id = "scrollbackAnimation" duration = "10" repeat = "true" easeFunction = "linear" > <Vector2DFieldInterpolator key = "[ 0.0, 0.5, 1.0 ]" keyValue = "[ [0.0, 0.0], [360.0, 0.0], [0.0, 0.0] ]" fieldToInterp = "movingLabel.translation" /></Animation>
But the important difference in this example is that we add a Timer node, which we intend to change the text of the Label node half-way through the animation. We give it an ID, which for this particular use, is required, because we must be able to identify the node in BrightScript code in the <script> element:
id = "textTimer"
We also define the repeat and duration fields in the same way as an Animation node, but note that we set the duration field value to 5, half the value of the same field in the Animation node:
repeat = "true" duration = "5"
This is how we can change the text of the Label node half-way through the animation. All we need is to add the following BrightScript code to the init() function:
m.movinglabel = m.top.findNode("movingLabel")scrollback = m.top.findNode("scrollbackAnimation")texttimer = m.top.findNode("textTimer")m.defaulttext = "All The Best Videos!"m.alternatetext = "All The Time!!!"m.textchange = falsetexttimer.observeField("fire", "changetext")scrollback.control = "start"texttimer.control = "start"
Most of the code is setting up variables and objects we will need to actually change the text itself. The most important line of code for this example is the use of the observeField() method to set an observer on the fire field of the Timer node:
texttimer.observeField("fire", "changetext")
As described in Timer Markup, the Timer node fire field will be set after the number of seconds specified by the duration field value. By setting the observer on this field, we can trigger an event handling callback function changetext() when the field changes:
sub changetext() if (m.textchange = false) then m.movinglabel.text = m.alternatetext m.textchange = true else m.movinglabel.text = m.defaulttext m.textchange = false end ifend sub
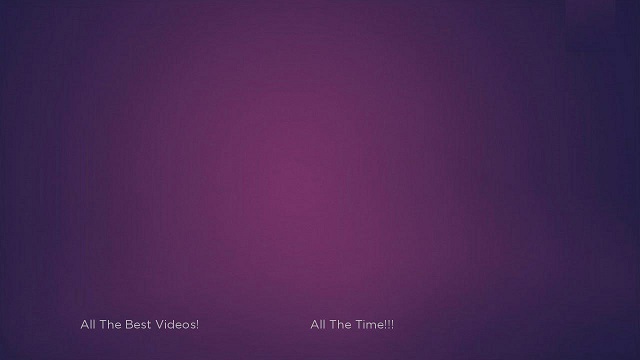
This is the function that actually changes the Label node text every five seconds, as the repeating animation reaches its furthermost limits. The text alternates between All The Best Videos! and All The Time!!! every five seconds:
Again, as in Vector2DFieldInterpolator Markup, you can watch the animation scroll back and forth, and the text change, over and over and over again...
Key Events Markup
Example Application: KeyEventsExample.zip
SceneGraph References: <script>, onKeyEvent()
Pressing the keys on the Roku remote control generate specific events for each key, as well as a general event when any key is pressed. This gives you full control to initiate actions in your SceneGraph application in response to remote control key presses, many times in the <script> element of a SceneGraph XML component file (see <script>). The SceneGraph API includes a special function, onKeyEvent(), that can be used in the <script> element to control the component defined in the XML file (see onKeyEvent()).
In this example, we use the OK key on the remote control to show and hide a Label node.
<component name = "KeyEventsExample" extends = "Scene" >

  <script type = "text/brightscript" >

    <![CDATA[

    sub init()
      m.top.backgroundURI = "pkg:/images/rsgde_bg_hd.jpg"

      m.label = m.top.findNode("exampleLabel")

      examplerect = m.label.boundingRect()
      centerx = (1280 - examplerect.width) / 2
      centery = (720 - examplerect.height) / 2
      m.label.translation = [ centerx, centery ]

      m.top.setFocus(true)
    end sub

    function onKeyEvent(key as String, press as Boolean) as Boolean
      if press then
        if (key = "OK") then
          if (m.label.visible = true)
            m.label.visible = false
          else
            m.label.visible = true
          endif

          return true
        end if
      end if

      return false
    end function

    ]]>

  </script>

  <children>

    <Label
      id = "exampleLabel"
      width = "600"
      height = "60"
      text = "Press OK to Hide/Show"
      horizAlign = "center"
      vertAlign = "center"
      visible = "true" />

  </children>

</component>
The Label node is defined like the example in Renderable Node Markup. But we've defined the visible field that is normally set to true by default:
visible = "true"
We're just doing this to absolutely ensure the starting condition of the Label node, which is visible, because we'll be setting this field alternating between true and false depending on the user pressing the OK remote control key. This is all done in the onKeyEvent() function, after declaring the m.label object in the init() function using the findNode() method:
function onKeyEvent(key as String, press as Boolean) as Boolean if press then if (key = "OK") then if (m.label.visible = true) m.label.visible = false else m.label.visible = true endif
return true end if end if
return falseend function
The logic is simple. If the OK key is pressed, and if the m.label object is visible based on the setting of the visible field, the label is made invisible by setting the field to false. If the m.label object visible field value is false when the OK key is pressed, the field value is set to true, making the label visible.
There's a few important things to note in this event handler function definition. First, the function returns either true or false to the firmware, and by default we want to make sure the return value is false (the remote key press event has not been handled), to avoid any possibility that the firmware will prevent further action of the application, or the user to control the application. So we explicitly set the return value to be false at the bottom of the function, after the key press event has not handled by any of the conditions in the function:
return false
We only want to return true when we are sure we have handled the specific key press event correctly. This all typically takes place in an if press then conditional statement block as above, which handles the general key press event. We want to add a conditional block to detect and handle the specific key event, handle the event, then return true in that block to prevent any possible further processing of that key event. (Remember from the SceneGraph XML Guide that any remote control key events that are not handled by any node in the SceneGraph are automatically are handled by default at the top of the SceneGraph, or by the firmware, by default.)
The main event handling is done in the conditional code block that detects the OK key press. On each OK key press, the code checks the visibility state of the Label node, and toggles visibility according to the current state:
if (key = "OK") then if (m.label.visible = true) m.label.visible = false else m.label.visible = true endif
return trueend if
If you haven't done this already, download and side-load KeyEventsExample.zip, and press the OK key repeatedly.
